Archive for Uncategorized

Custom Cookbooks – A Blend of High and Low Tech

Listen with webreader

Overwhelmed by Cookbooks

Imagine thirty feet of tables covered with three rows of cookbooks placed spine up for easy reading.  The floor underneath is covered with boxes holding more cookbooks.  This is temptation central, otherwise known as the Friends of the Library Book Sale.  Other topics fill other tables, but right now I’m focused on the cookbook section which promises spicy Mexican meals, Indian cooking made easy, Mediterranean menus which promote good health, bean dishes, vegetarian dishes, French cooking for the gourmet, White House favorites, thirty minute meals, casseroles for every day of the year, desserts to highlight any meal, and Northwest specialties.

The list could go on, but it’s making me hungry.

Some books are easier than others to pass over because I rarely make desserts, even more rarely eat red meat, and favor spicy one dish meals.   Maybe just one recipe in a book looks tempting, so I ask myself, “Do I really want to pay a dollar if I’m going to use just one recipe from a book?”  Why do I even ask?  After half a century of eating my own cooking, a new recipe that both my husband and I like is a treasure.

Now imagine my bookcases.  I’m an avid reader who is a committed Anglophile, especially the years of Elizabeth I, plus I like science, history, and anthropology.  And so many books have to be kept and reread.  When the floor under the bookcase begins to sag, it’s a hint that I need to thin out. Last time the row of cookbooks was my target.

Technology Offers a Solution

We recently got a new computer printer with a built in scanner that makes it easy to quickly copy recipes.  I spent an evening going though the cookbooks and putting post-it notes on pages to copy.  Some books had just one or two post-its while other had so many the tops drooped like the tails of over fed birds.

I dedicated a day to the scanner, but copying all the recipes took less than two hours.   Technology! A three hole punch made all the pages ready for an old fashioned three ring binder. I categorized the new recipes into vegetables, poultry, lentils and beans, meat and fish, international, salads, desserts, pasta, cheese, breakfast, and canning.

A Personalized Cookbook!

I love my new one-of-a-kind-just-what-I-like cookbook!  Now instead of trying to think of what to fix next week and then going to check the recipe while I make out a shopping list, I thumb through my own personal cookbook and see what looks good at the time.

It’s easy and efficient.  I’ve even been motivated to fix some recipes I copied because “someday” I wanted to try them.  Now I have a personally customized cookbook that makes  life both easier and tastier.  Why didn’t I do this years ago?

Of the recipes I’ve tried so far, here’s an unusual and very tasty vegetable side dish from page 78 of the Totally Garlic Cookbook by Helene Siegel and Karen Gillingham. It’s a palm size paperback shaped like a head of garlic. Try doing *that*, O Kindle!! I’ve made a few modifications, feel free to try your own.

Green Beans with Walnuts and Garlic

Serves 4-6

  • 1 pound green beans, string and tough ends removed. Or not. If they’re fresh enough, green beans need next to no preparation.
  • Coarse salt (Kosher or sea salt) to taste
  • 1/2 bunch parsley
  • 1 cup walnut halves
  • 10 cloves garlic, peeled
  • 1 chicken bouillon cube (Ed: We recommend a teaspoon or so of “Better than Bouillon”)
  • 1/2 teaspoon freshly ground black pepper
  • 1/3 cup olive oil

Drop beans into boiling, salted water.  As soon as water returns to boil, remove beans and immediately plunge into iced water.  Drain well.  Place blanched beans in a large bowl and set aside.


Remove leaves from parsley and place in food processor fitted with metal blade.  Set aside 1/4 cup walnut halves for garnish.  Place remaining walnuts in food processor with parsley.  Add garlic, bouillon cube (Ed. Or 1 tsp. “Better than Bouillon”, and pepper.  Process until mixture is like paste.

With the machine running, slowly drizzle in olive oil.  Mixture should be the consistency of thick syrup.  This is much like a kind of pesto. Tip: You might want to add the juice of half a juicy lemon – your call!

Pour over beans in bowl and toss to coat beans thoroughly.  Serve at room temperature garnished with walnut halves.

Jane Roll is an educator and world traveler who lives in Seattle when she’s not in some far away place, learning about new cultures and cuisines

Leave a Comment

Who Knew? It’s National Grilled Cheese Month

Listen with webreader

Grilled cheese sandwich by Thomas Keller - yours may not end up looking quite like this - read on

I suspect that the few people on our planet who don’t like grilled cheese sandwiches are:

  • Vegans
  • Aliens from Another World – (see?? They’re not really from our planet at all)
  • People Who Believe Fried Food will kill you. Handy tip: *Everything* will kill you. Proof: You live, you eat – whatever – eventually you shuffle off this mortal coil. So, by this impeccable logic, food is just plain dangerous.
  • Lactose Intolerant Folks
  • Gluten Intolerant Folks

Much like chili or spaghetti sauce, *everybody* knows how to make The Best Grilled Cheese Sandwich in The World. This makes me think of Lake Woebegone, where all the Grilled Cheese Sandwiches are eaten by above-average children. I don’t believe that there is any such thing as the Best of Any Food. Is there a “Best Watercolor in the World,” or a “Best Short Story in the World,” or a “Best Joke in the World”. Hmmm. . .I didn’t think so either.

Food is art, or as my niece Sarah, the Executive Pastry Chef, and a far wiser foodie than I, is wont to say, it’s “Sex on a Plate”. Is there a “Best Kind of Sex”? Hmmm. . .again, I didn’t think so either. I say potato, you say The Kama Sutra Passion Propeller. No, I am *not* linking to that, so stop asking – this is a food blog, dammit.

Art is just like that.

I was gratified to see (via the very fine blog YumSugar) that Thomas Keller, one of the true deities in the world of food, likes a “simple” GCS. His recipe is here. And yet still, despite the fact that Keller is the Caravaggio of the food world, I feel he’s missed an important element. His recipe uses brioche. Good stuff, browns up nicely, suitably complex. For a bread. I have no objection to his choice of two cheeses, although me, I like to pick a single cheese and stick with it, and I love Love LOVE the fact that he pops a few Lays chips in between the layers of cheese, because. . .well, *I* do that too.

Tom?? Call me, we’ve got a lot to talk about.

It’s the Bread

People spend a lot of time – I know, I’m one of them – refining and perfecting sauce recipes for pasta. But really, in the classic sense, it’s all about the pasta. The sauce is a garnish. Sure, here in the States, we like to put a kilo or so of sauce on our pasta, in the spirit of “More is Better” that we’ve all seen work so well for Goldman, Sachs and Bank of America, but truly, just a dollop or two of good sauce on perfect, fresh, well-made pasta of just the right shape – well, you’ve gotta try it. sometime.

Mario Batali offers a simple recipe for fresh pasta that I’ve tried and liked. I’d only suggest adding another egg yolk or two, but that’s just me. Eggs are variable. It’s dead easy and makes a gorgeous fresh pasta. Bonus – fresh pasta cooks in mere moments, and not very many of them.

So – just as the pasta’s the thing, in a grilled cheese sandwich, the bread’s the thing. And it’s like art. My bread might not be yours, Thomas Keller’s brioche might not be my Passion Propeller.

What’s mine, you ask? OK, it’s one of those childhood memory things. When I was a kid, living in Lowell, Massachusetts, grilled cheese was on the menu. It was fast and easy to make, and occasioned no crying “I don’t like grilled cheese” because – well – we loved it and could eat it every day. The bread came from a small bakery in Cupples Square and I regret to say that the passage of time has eroded my memory of that wonderful place’s name. Suffice it to say that it was Corn Rye.

If you don’t know what Corn Rye is, or you’ve tried big-manufacturer rye and said Blecch, you owe it to yourself to find a place where you can good a real loaf. Or you can make some – but if you use this recipe (which is excellent), where they say “more caraway seeds for inside if desired”, I can only add “DESIRE”!

Once you’ve got your Corn Rye, the rest of the sandwich is up to you. I won’t prescribe cheese, but along with Mr. Keller, I would strongly urge placing a few thin potato chips in the sandwich – your choice of brands. You will not regret it. Me, I love a nice sour pickle, or a handful or cornichons on the side with my grilled cheese – I think they’re the perfect foil for its unctuous goodness.

Enjoy Grilled Cheese Month – And, if you belong to one of the non-medical groups who don’t like grilled cheese sandwiches – expand your horizons – try one. Heck, you don’t even have to find a good Corn Rye – you can use a brioche, as the estimable and brilliant Mr. Keller recommends. Just keep it simple. As my mother used to say “How do you know you don’t like it if you won’t try it??” People also say this about bungee jumping and BASE jumping, but I suggest that is a crazy horse of a different color.

All right – fine!! You want to know what I think is the World’s Greatest Grilled Cheese Sandwich. Fine. Remember, as they say, YMMV, and this is just what I personally happen to like.

Ingredients for The Best Damn Cheese Sandwich in My Personal World

  • Good quality corn rye bread
  • A heavy fry pan. This is one of the very few recipes where I’m perfectly OK with the non-stick variety, if that’s what you’ve got, by all means, use it!
  • A nice mild cheese – I happen to like, in no particular order: Tillamook Medium Chedder, Jarlsburg Swiss, and Dofino Havarti. These are not Magic Cheeses, but remember, it’s not so much about the cheese. . .You can use a combination, but again – one cheese is less distracting than two in this dish.
  • A few thin potato chips. If you open the bag of  Kettle cooked chips and find slices of potato that appear to be a quarter of an inch thick, give ’em a miss. Lays’ are good for this purpose. Sorry, they just are. In my locale, Kettle Chips “Lightly Salted” are also very good, but they’re way more expensive and Lays’ makes the grade, so – your call
  • Butter. You do want the butter to be nice and soft. And, if you want a little extra flavor, get some actual cultured butter. In this particular dish, it’s just better.
  • Best Mayonnaise. I can hook you up with a back alley cardiologist for a scrip. Or make your own mayonnaise, the food police have yet to ban this activity.
  • About 3-4 slices of the cheese you want. The cheese should be mild, not overly assertive, and melt well. Swiss, mild or medium Cheddar, OK, I’m about say this, and do not flame me, because it’s good – Velveeta. We’re not talkin’ about the ecology of Velveeta, just its suitability for a grilled cheese sandwich.

Make Your Sandwich

The key is to fry at a medium high temperature and watch carefully so you brown darkly but do not burn the bread. So:

  • Butter the outside of both slices of bread. Be liberal in your use of butter. Go ahead, you’re not going to eat this every day. Are you?
  • Spread a teaspoon or so of the mayo on the inside of both slides
  • Lay a couple of your Chosen Cheese slices on the bread. Tip: Try to keep the boundaries of the cheese about a quarter inch or so inside the bread. You can do this by breaking off extraneous pieces and eating them. It’s what I do.
  • Place your Chosen Chips onto the cheese
  • Add the rest of the cheese on top of the chips
  • Put the second piece of bread (butter side out) on top and smoosh it down gently with your hand until you can hear a faint crackling as the chips crumble a bit. This lets you eat your sandwich without finding a large gooey chip hanging out of your mouth at some point. If you like that sort of thing – and food is art – then omit the smooshing, but do make sure the sandwich sits solidly together.
  • Heat the pan until it’s medium hot and place the sandwich in the pan. You should almost immediately hear a little crackling and hissing – nothing too fierce, but it’s obvious the butter is melting and the bread is starting to brown. Tip: Please do not press down on the sandwich to compress it or hasten its cooking. OK, this isn’t actually a tip, it’s just a plea. Doing this compacts the bread unacceptably. And yes, it’s unacceptable to me. I’m just that way. You may like compacted bread, in which case, you can crush the sandwich until it’s the thinness of a cracker. It will still be good, because that’s what you like! 🙂
  • When the bread on the first side is nicely browned (at this point the cheese should also be well on the way to softening and melting), flip the sandwich over (you may need to turn the heat down just a bit at this point. Smell the pan. Is it starting to smell a little burned? Turn the heat down. Look at the pan – are there very dark bits of butter hither and yon? Turn the heat down a bit.
  • Cook in the same way for another 2-3-4 minutes. It really shouldn’t take long, the key is you want the cheese to be at that stage just beyond softening, where’s it’s melted but not quite flowing.
  • Take the sandwich out of the pan, slice it in some fashion that appeals to you and serve it. To yourself!! BWHAHAhahahah. Or, to a loved one. Nothing says true love more than making a beautiful grilled cheese sandwich for your SO.
  • Don’t forget the pickles or something just a little sour / vinegary to serve as a counterpoint to the perfect unctuous goodness of the sandwich.
  • Lager beer is good. If you drink wine with this sandwich, I will hunt you down and chastise you. OH, OK, fine, truly it is a choice – Prosecco is actually not terrible with grilled cheese, I think it’s the tartness and bubbliciousness  that makes it work.

I think it was Joni Mitchell who, when asked about the difference between painting and music said (and I’m probably paraphrasing) “Nobody ever said to Van Gogh, “Hey, man – paint A Starry Night again.” So, I guess in that sense food is a little more like music, because once somebody has tasted your GCS, they will very likely say, “Hey man, would you mind making me another one of those.”

Peace.


Comments (3)

Tweaking the Classics – Cream of Asparagus Soup

Listen with webreader

Respect for Your Ingredients

When you’re cooking soup with lots and lots of beautifully fresh asparagus, you’ve got to remember that the asparagus is the superstar. But  – even as sometimes happens in the movies – the supporting characters can make the star shine even brighter. My goal was to make cream of asparagus soup that my my mother in law would love, but that had a few small twists to help pop out the flavor of the fresh organic asparagus we’d picked up at Schuh Farms, our neighborhood farmstand. OK, it was from California, but it was *very* fresh, it was organic (just try and find inorganic asparagus – I dare you!), and we don’t have any local asparagus of note here in Seattle quite yet.

The First Rule: Use a LOT of Asparagus

It’s always startling when I say this, but roughly a pound of asparagus per serving is about right. The recipe doesn’t scale linearly, so you can get away with using, say 8 pounds of asparagus for 10 people. But really, 10 lbs. will not hurt. I promise. You’re just gonna need a really big pot.

The Second Rule: Buy from People You Trust – The Central Market Story

I buy produce at Schuh’s, but when I’m picking up a bunch of stuff and need to shop at a supermarket, there is only one place I go – Central Market. Central is a small locally-owned chain (I think they have 5 or 6 stores), and here’s why you shop there:

So I’m wandering about in my usual contemplative daze through the produce department. I want citrus. Many interesting recipes for C of A soup call for a bit of lemon, but I want something with a gentler, friendlier nature. Ah! Cara Cara oranges sound right. Where are they? So – I ask one of the produce peeps where they are, and he takes me to them. I sort through a dozen and find two perfect oranges. Yes! The guy is watching me, and asks, “Do you mind if I ask what you’re going to do with those?”

“Sure – I’m going to use the juice and zest in cream of asparagus soup.”

“Cool idea. You know, for the same price, though, you might want to consider the Heirloom navels. Their flavor – and probably the zest – should stand up better to cooking than the Cara Cara and they’re not as sweet, so you won’t have as much competition with the asparagus.”

LOVE. Thank you.

Off to the deli counter, which looks a little bit like this:

This is about 1/16th of the deli section. . .

Hmmmm. . .I love asparagus wrapped in San Daniele prosciutto. I think I’ll get some to crisp up for the garnish. One of the folks behind the deli counter asks me what I need, and I vaguely say “a little San Daniele prosciutto,”  Nothing daunted, he asks “How much – two – three pounds,” Haha. OK, I need about 8 slices. “Do you mind if I ask what you’re going to be using it for,” (are you sensing a pattern forming here?)

“Sure – I’m going to slice it into shreds, crisp it up and use it as a garnish for cream of asparagus soup.”

“Sounds awesome. You might want to consider either the Speck or the Jamon Serrano instead, though – they’ll crisp easier and they have a beautiful crackling texture when you cook them. Would you like to try a slice of each?”

Ummm. . .sure. . .this was clearly not a trick question. I tried ’em both and I loved the Jamon Serrano, which was about six bucks a pound less than the San Daniele.

Both these suggestions worked out really well – I love love love markets where the staff actually:

  • Knows what the hell they’re talking about
  • Is excited about sharing their knowledge
  • Doesn’t try to constantly up sell.  Sure, sometimes the costly product is the right product, but you know – sometimes it’s really not.

Who wouldn’t want to shop at a place like that? There must be someplace like that where you live. What’s it’s name? Why do you like it?

Getting Ready to Make the Soup

I get home, offload supplies, clean up the asparagus, snip off a few choice tips with my gorgeous new ceramic knife. A dear friend and frighteningly smart social marketing consultant just gave me a set of them – I normally don’t get excited about ceramic, but these are so light, and easy to use, with a well-shaped handle.  They’re so sharp, you can feel them cutting the air in half as you move them towards the food. Thank you, Kathryn Courtney Wachs, you’re one of the best eggs I know.

OK, I cut up and prep what real chefs call the mise, but I think of as “all the sh*t I need to make the soup”, as shown below:

Oops sorry – but this *is* an important ingredient after you’ve finished using the very very sharp ceramic knife


I’m sorry, these darned blogs, what I meant was (waving hands in the air) “Pay no attention to the little martini on the counter, this is what you really want.” Chopped onion, sliced leek, little bit of minced garlic, orange zest from heirloom navels, juice from one orange. We ate the other one. Hey, we were hungry!! Yes, that is a Meyer Lemon, thank you, but I decided against using it.

Ready to start preparing the soup!


By the way, might I add that the leeks were guys that had wintered over in our garden and were awfully good.

Sweet overwintered leeks from our garden


So, OK, you’re telling a nice story, but how do I make this soup already??

Thanks for asking! Here’s how I ended up putting it together:

Cream of Asparagus Soup with Crisp Prosciutto, Melted Orange Zest and Asparagus Tip Garnish

I have *got* to come up with a snappier name for this dish – any ideas??

Ingredients for about six to eight servings:

  • Six pounds of the freshest asparagus you can find
  • About two quarts good quality chicken broth
  • A pint or a pint++ of half and half (I’m a chicken, but next time I swear I’m using heavy cream, it’s not like we’ll be eating this every day)
  • About the equivalent of a stick of butter. Tip: This is one of those times when using good quality cultured butter makes a real difference in the taste.
  • Nutmeg – I used about a half teaspoon or so – this is really a matter of taste, so add it a bit at a time. The idea is you do *not* really want to taste the nutmeg, you just want to know that something’s going on that makes the asparagus flavor more pronounced.
  • Four or five leeks, rinsed, white part and light green part sliced. Or, half a medium sized white onion, chopped, and the two nice overwintered leeks from your garden. Next time, I’m going with the all-leek motif, we loved the flavor and wanted more!
  • Two or three garlic cloves, finely minced.
  • A few slices of prosciutto. Using a sharp knife, you’ll slice the prosciutto into approximately 1/2″ wide slices, which you’ll slowly crisp up in a tiny bit of butter or olive oil. It’s a garnish! But – there’s something about asparagus and prosciutto that is just irresistible. Let your conscience be your guide. I generally err on the side of “use a little more”. Your mileage may vary.
  • An heirloom navel orange. Or a navel orange. Or some kind of orange that’s not too sweet. You’ll want to slice off as many long strips of zest (the orange colored skin, with as little of the white part (sometimes called “pith”, probably because that’s what it tastes like) as possible. Then juice the orange into a container, ready for action.
  • Freshly ground black pepper and salt to taste. Tip: When you’re making most any dish, it’s a good idea to not add much salt at all (unless it’s necessary for some element of the cooking) until you’re close to the finish line. Yeah, your friends will ask for a taste about three seconds after you’ve started cooking something and say, “this needs salt”. Duh. It will have salt when the time is right, OK? Now sod off. Alternatively, offer them a large glass of wine or a martini – that usually distracts most people from trying to taste what you’re making before it’s ready to be tasted.
  • A large pot for the soup
  • An immersion blender (best), a blender-blender (not bad), a food processor (works, but really not the best tool for the job)

Preparation

Once you’ve cut everything up, make a large martini. I like olives. Many olives. But I also like a nice strip of orange zest. Oh, wait, sorry. . .here goes:

Rinse and prep the asparagus. Snap off the stem ends and reserve for another purpose. Compost is an excellent option. Slice off 15 or 20 of the tips (make the slices about 1-1/2″ or so. Put the tips in a microwave-safe bowl, add a scant teaspoon of water, and nuke ’em for about a minute, then remove. You’re really just trying to blanch them, not cook them.

Slice the rest of the asparagus into chunks about an inch or two long. You’ll end up with a good sized bowl full of asparagus pieces.

Melt a tiny bit of butter in a fry pan over medium heat, then add the strips of prosciutto. Toss around to coat, and make sure they’re separated from each other. Cook on low heat, stirring and turning gently now and then.

Melt the rest of the butter in the bottom of your stock pot over medium heat. When it’s stopped frothing, add the onion / leeks / whatever you chopped up and stir about to coat. Cook for about six or seven minutes, stirring frequently, you do not want the onion to burn or really even to sear, so turn the heat down if this appears to be happening.

Add the garlic and stir it in for a minute or two until you can really smell it.

OK, toss in the sliced asparagus, and toss, stir until it’s well coated with the melted butter. Cook over medium-low heat for about ten minutes, stirring regularly until it’s softened.

Add about half the nutmeg, the strips of orange zest and gently stir them in (try not to break up the zest, you’ll be removing it before you serve the dish). This is a nifty trick I learned from the brilliant Kathy Gori, proprieter of The Colors of Indian Cooking, which I recommend visiting. Great food and wonderful writing!

The idea is that you add aromatics to the pot before you put the liquids in, and fry them up just a bit. It can be little tricky, since you don’t want to burn them, but putting them in at the very end mixes them with all the other stuff you’re frying up and makes burning them far less likely. Be careful and I think you’ll love the result. You’ll totally love the remarkable aroma of the nutmeg and orange as they (gently) fry up.

Add the juice from your orange and cook until it’s very gently simmering. Simmer for just a bit. I like to add the juice first so I can simmer it down a little for. . .ummm. . .”flavor intensification purposes”.

Add about two quarts of good quality chicken broth, and stir gently to mix it with the fried ingredients. Then add the half and half. OR GO WILD – USE HEAVY CREAM. I know a disreputable cardiologist who will happily write you a prescription for this allegedly deadly substance. 🙂

Bring to a gentle simmer – you don’t want the broth to boil. Stir occasionally. Simmer for about ten minutes or so. Now it’s time for serious pulverization to happen.

Kitchen Equipment – The Immersion Blender

You may have seen the industrial quality immersion blenders used on food porn shows like Top Chef, Iron Chef, Tungsten Chef, Aluminum Chef and that cute chef who everybody seems to dislike, but I kinda like her. Let’s call her Perky Chef.

You don’t need one of these. But you’d be smart to nip out and pick up a home version – you can get a very good quality immersion blender for 50-75 bucks or so, and it’s worth its weight in Perky when you need it, which is actually fairly often.

In a fit of parental adoration, I just gave ours to our daughter (“oh honey, I’m glad you liked it. Why don’t you just go ahead and keep it, I can get another one.” Yes, I am A SAP, but I loves me my girl).

So, I had to use our food processor (with the chopping blade) to pulverize the soup. DANGER! Food processors can be quite dangerous to use for processing batches of hot liquid. Note: before processing – use tongs or fingers or whatever you like to remove the pieces of orange zest. Do not toss them – they will have a wonderful use in a moment. Taste a bit of the zest. Just a wee nibble. Amazing how a little time in the hot soup tones down the zesty-ness and turns it into something lush and lovely. If you miss a small piece or two, it is not a big deal, but do try to remove all the larger pieces.

Federally mandated Safety Instructions follow: Here are the things you really want to do to 1) Get a good result 2) Avoid scalding yourself or enjoying a food processor mini-explosion from the buildup of steam inside the container, or the worst danger of all 3) Splash boiling soup into your martini, rendering it unfit for further consumption.

  • Process in batches – unless you have a totally enormous food processer. In any case, do not fill the food processor more than half full with each batch. Takes time? Yes. Is a pain? Yes. Can leak a bit of liquid even in the best of circumstances? Sure. Remind me why I gave my only immersion blender to my daughter. Oh yeah. . .finger. wrapped. I am a SAP.
  • To process, do not put the  feed tube plug in tightly at first – leave a little opening for the very hot vapors to depart the vicinity of the bowl in a non-explosive fashion.
  • Before you turn the processor on to continuous pulverization, give it a few short jabs. Trust me on this.
  • Did I mention not filling the processor more than half full?
  • You shouldn’t have to process each batch more than 10-15 seconds or so.

After you’ve finished each batch, pour it into a large bowl. When you’re done, pour the now-creamed soup back into the stock pot. Or, use the immersion blender, which means putting the blender into the stockpot and moving it around. You should have a bit of height between the top of the soup and the top of the stock pot, but that’s about it.

Taste the soup. Smell the soup. Bond with the soup. Correct for seasonings – yup, now you can add the salt and pepper you think it needs. You can also add another pinch of nutmeg if you think you need it. I always go light on salt and pepper, because it’s so easy to put a salt shaker and pepper mill on the table. You should be able to cleanly taste the asparagus and the leeks. Bring the soup back to a gentle simmer. Hot soup is the best!

The Good News

My optimistic heart says that since I’ve given away my old immersion blender to my daughter, at least I can now get my heart’s desire – the KitchenAid 300W hand blender.

Oh, and the other good news – this soup is so good that – as my Executive Pastry Chef niece Sarah likes to say, “It will make you want to grab a chair and throw it through a window.” See Sarah’s earlier post about why you might do this here.

You’ve blended your soup. Now what?

Good going. You now have a large stockpot full of simmering deliciousness, with seasonings “corrected”. Time to serve. Here are a few tips to make your bowls of soup pretty and even more delicious.

  • Heat your bowls. You can put a stack of soup bowls in a microwave (check for microwave safety first) and run the microwave for about a minute and a half. Ta da! A nice warm stack of soup bowls.
  • Remember the little crispy strips of prosciutto you made? Now’s the time to use them.
  • Those big chunks of delectable orange zest that you removed from the soup before blending? Take a very sharp knife and slice them into a fine julienne.
  • Get your blanch’ed asparagus tips ready.
  • Plate by ladling the soup into the bowl, adding a few artful strips of prosciutto, an asparagus tip or two, and drift a few of the julienned orange zest bits on top of the other garnishes. This is the part that I’m working hard on. I’m OK, but making your food look beautiful means you’ll hit every sense but sound – it will taste gorgeous, smell remarkable, and look beautiful. The trifecta. The sound comes when your guests say, “OMG that is *so* good!”

Serve With: We like to serve this with a simple green salad and some nice warm slices of baguette. It doesn’t need much else. Unless you’re in a major feast mode, a bowl or so of this soup + salad + bread + a Perky white wine = a really good meal.

Editors Note: We are not thrilled with the picture below, the prosciutto looks like sun dried tomato and we forgot to wipe down the edge of the bowl. As we noted, we’re working on the whole “plating” thing. Click the image twice and it will look a little bit nicer.

Finally -the asparagus soup in its bowl, soon to be eaten - see the wee little bits of orange zest?


The resul

Comments (1)

Sustenence is more than a word

Listen with webreader

There are dishes that I’ve cooked for my family since the kids were small. Oh, I’ve tarted them up a bit over time, but there are just some dishes that you don’t mess with. Possibly because they work, possibly because you remember the smiles on the faces of your friends and family when they eat, possibly because you’re lazy! 🙂 Nonetheless, there it is – you serve this dish and everybody sits down to table smiling, knowing they will be. . .sustained, and not just by eating tasty calories.

So everybody, and I do mean everybody – every “recipe” blog and food site on the Web (at last count, over sixteen trillion of the things, so thanks to those of you who visit mine – it’s a needle in a haystack. Or a pin bone in a very very large salmon fillet) – everybody, as I was saying, has a recipe for meat sauce. Ragu Bolognese. Spaghetti sauce. Gravy. Call it what you will.

I’ve been making this dish for my family for decades, and although I’ve learned a few tricks, the essence of the dish remains the same, as do the smiles on the faces of family – and on the faces of those friends who we know well enough to feed ’em “family food”. That’s one thing that sustains me. Watching people chasing after the last little bits of sauce on their plate with a scrap of bread is a beautiful, nourishing thing. The look on their faces is one usually reserved for when you’re trying to figure out how to get a little extra edge on your tax return, or reading a really great novel – so concentrated, so intent, so focused. Only without the worried part – just happy concentration. It’s beautiful.

What?? I Can’t Smell You

Here’s a little trick – smell is one of your most important tools, but there’s a small problem with smell. If you’re in the kitchen, working away, humming a merry tune, chopping, slicing, frying, dreaming, you might notice that. You. Can. No. Longer. Actually. Smell. What. You’re Cooking. Your brain has a self-defense mechanism – really, it’s just doing it for your own good. It’s a mechanism that works for most senses – after you’ve smelled something for a while, or listened to something, or seen something long enough, the sensation just fades into the background. You can still smell, hear, or see something, but it’s a pale shadow of what’s really going on.

Since this isn’t a philosophy blog, that’s as far as I’m going to take that notion. However. . .when you’re cooking, there’s a workaround. Step back from the stove. If you can, step outside. Look at the flowers (or the cars or whatever you see outside your home), breathe deeply. In through the nose, out through the mouth. Try and stay outside at least a minute or two. When you step back in, the true aroma of what you’re cooking will smack you on the side of the head and you’ll say “Marjoram!! I *knew* there was something missing.”

How About You?

What do you cook that you may have cooked for years and still just totally love? By the way, it doesn’t have to be a family dish. If you’re a single person, what do you cook when you just want to be happy and eat something good, and don’t want to go to a restaurant, but want badly to be in the comfort of your home, eating something you love.

The Recipe“Spaghetti Sauce”

You’ll need the following for 4-6 good servings. Cut in half and you’ve got a meal for one, with awesome leftovers. I urge you to consider making this the night before or even two nights before. It is so much better the day or two after it’s first made.

  • A large fry pan. Saute pan. Some kind of pan
  • A large bowl that can handle having hot vegetables and oil poured into it.
  • One medium-sized white onion, cut into a medium dice
  • One good-sized carrot, finely diced. Old carrots are good!!
  • One stalk of celery, sliced thin
  • A handful of minced parsley

    Fresh ripe tomatoes add brightness to your sauce!


  • 4 cloves of garlic, minced (I actually use more like 8-10 cloves, finely minced, but that’s just how I roll. Find the amount of garlic that makes you smile.)
  • About an ounce of tomato paste (TIP: Get tomato paste in the squeeze tubes. That way you can use just what you need – which is always less than what most recipes call for – and the rest will keep indefinitely in the refer)
  • Two pieces of Parmesan rind. These are the rinds that are left over at the market when they cut up the Parmesan. They are goodness, and they are cheap! Most good supermarkets will have them, sometimes you have to ask.
  • 3-4 firm ripe tomatoes, your choice. You don’t need to remove the skin – but it’s a good idea to quarter them and scoop out all the seeds and pulp. Medium dice.
  • Extra virgin olive oil (I always thought you were either a virgin or you weren’t, but I guess it applies differently to olive oil.)
  • One large tin of good quality crushed tomatoes (they vary by region, Muir Glen are quite reliably good – here’s a link to a nifty Chowhound forum discussion on just this very topic!)
  • Red wine. Doesn’t have to be an awesome vintage – these days, I buy the “two-buck chuck” at Trader Joe’s and find it quite acceptable.
  • Brandy or cognac or bourbon. You’ll only need a tablespoon of this potent flavor additive. Note: In cooking, you’ll vaporize all (or almost all) the alcohol – this is a dish you can serve to anybody.
  • About 3/4 lb. of the cheap ground beef. It has more fat. You’ll drain away most of the fat, but the flavor you’ll get is far better than the ultra-lean ground beef that costs so much. Everything has a purpose!
  • Oregano. Dried is fine, truly.
  • Thyme. See the note about dried oregano.
  • Basil. Dried is not a good idea. Get a handful of fresh, rinsed and patted dry basil leaves and tear them with your hands into tiny bits.


    Fresh basil, please!

  • A pinch or two of nutmeg
  • Optional – a teaspoon of dried marjoram. It’s dry, dusty and, with the cocoa powder and maple syrup (or sugar), adds depth to the sauce.
  • A tablespoon of cocoa powder – the real stuff, just plain cocoa. This is optional, but so so good. You won’t even taste the chocolate – you’ll just feel a dark, rich “undertone” to the sauce.
  • Maple syrup – about 2-3 TB to taste. Or sugar. If you’ve got maple syrup, it’s a huge plus!
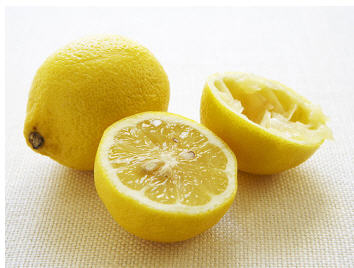
  • Lemon juice. These days, I favor Meyer lemons, they’ve started to come down in price, but any fresh lemon juice is just fine)
  • Salt, pepper
  • Shredded Reggiano Parmesan for serving

Cook it up

Put a large fry pan on the stove and get it hot. This is important. Heat the pan over medium hot (you’ ll need to figure out what that means for your range-top, for me, it’s about 3/4 of the way to totally on), then add about two turns of oil (Note: that means pour the oil from your container around the pan twice – the dispensers on the containers are generally pretty standardized, this should give you about 2 oz. of oil or so.

When the oil is shimmering, but not smoking, add the onions and carrots. Turn the heat down a bit, and toss the onion carrot mixture about a bit, playfully, to coat everything with hot oil. Cook for about 4-6 minutes, stirring now and then, until the onion has turned translucent, and the carrot is softened. Add the celery and stir until the celery is softened – about 2 minutes or less. Add the garlic and stir until you can really smell it – should be a minute or so. Add a pinch of salt and a couple of twists of freshly ground pepper. Stir one last time and move all the veggies into that big bowl we talked about. Sprinkle a pinch or two of nutmeg on the veggies as they rest in the bowl.

Put the pan back on the heat, wait until it gets hot again – this won’t take long – and add the meat. With a large fork, press, smoosh, stir, and generally break up the meat. There will be a lot of steam at first, then, the steam will go away. Steam’s like that. Once you’ve heated most of the water out of the meat, it will start really cooking. Continue to stir, smoosh and scrape the bottom of the pan with the side of the fork tines. The meat will form small crumbles of goodness. There should be a healthy sheen of fat. Once the meat has just started to brown, drain the majority of the fat. I just tip the pan and use a large serving spoon to scoop up the fatty liquid. Leave a little fat in the pan, you can discard the rest.

Add the veggies back into the pan, and about an ounce or so of tomato paste. Again, using the fork, stir everything up, “cooking” the tomato paste and mixing it thoroughly with the other ingredients. At this point, you’ll have  nice lot of browned stuff on the bottom of the pan. This is goodness. Fancy folk call it the “fond”, in Asian cooking it’s known, more beautifully, as “the precious” (also applies to rice!). Now it’s time for the wine. Take about 1 cup of wine (to start) and pour it into the pan. Sizzling and steam will happen. Technically, this is known as “deglazing”, though it has nothing to do with glass.

With the side of your fork, scrape up as much of the good brown stuff as possible into the boiling winey mix. Add more wine if you like. I do. Cook the wine down by about half.

Add the crushed tomatoes, stirring to mix. Add the pieces of parmesan rind. Add about a TB of oregano (crush the dried herb between your palms to break it up even further. This gives it more surface area and – more flavor! Add about two tsp. thyme in the same fashion. Stir them in. Add the parsley. Taste the sauce, and add a little salt and freshly gr ound pepper. Just a little, because the sauce will be cooking down. You’ll fix the salt and pepper balance right at the end.

Turn the heat down to simmer and let simmer for an hour or two. Or three. Three is good. Four is better. If you can let it simmer all day, that’s awesome!! Just add a little water whenever it looks like the sauce is getting dry. Stir occasionally, being sure to scrape the bottom of the pan for any stray bits. Continue to simmer.

Tip: If you have one of those little pan screens – this is exactly what they were born to do. The sauce, even at a simmer, will tend to splatter and give you some extra cleaning work to do in the general neighborhood of the pan. Or you can use a pan screen.

By the time you’re done, the sauce should be moderately thick (for example, if you put a spoon into it, the spoon will come out with its back coated with sauce). Add the brandy and lemon juice (juice of about a half a Meyer or other lemon) and stir. Add the diced fresh tomatoes – they’ll brighten everything up beautifully. Add the torn shreds of fresh basil.

Stir everything into the mix and continue simmering for another 15 minutes or so. Remove the Parmesan rinds. Or don’t, just advise your happy eaters that the large knobby chunk of gooey goodness in the middle of their sauce is a piece of cheese. Taste and correct for seasonings. In other words, see if you’ve got the salt and pepper right. Err on the side of caution with these two key seasonings, as everybody has a different tolerance and it’s easy enough to put a salt cellar and pepper mill on the table.

If you’ve prudently made this sauce a day or two in advance, pop it into a large, sealable container and put it in the refer. Bring it out when the time is right, put it into a pan – probably the same pan – and heat it gently until it’s nice and hot. Have a large pot filled with boiling salted water (about 2 TB. salt per gallon of water – no worries, virtually all the salt will wash away when you drain the pasta).

Serve with – hmmm, my favorite pasta for this dish is fettuccine, but really you can use any pasta you like. Long noodles are generally preferable, and more fun! Boil the pasta in salted water until al dente, then drain the water, add a little bit of sauce to keep it from sticking, and fish out the individual servings with tongs, and add more sauce. Or just drain in a colander and put back in the pot, again adding a little sauce to keep it from sticking.

Fresh green salad. A bit of toasted, buttered baguette. A red wine that you like. A nice bowl of freshly shredded Reggiano Parmesan cheese for people to use as they will. Salt and pepper at the table. Happy people, which is really the best part.

I just can’t prescribe specific wines. I don’t like abstract expressionism. You love abstract expressionism. I don’t like almost any zinfandel, you adore zin of all kinds. I say potato. Wine is a personal matter. If you don’t think so, try doing a completely blind (brown paper bag) tasting with some of your wine-loving friends. 🙂

I’ve been making this sauce for almost three decades, with minor variations here and there as I feel the urge to experiment. And I’ve been watching family and friends smile as they sit down to eat a little bit of love on a plate. My wonderful niece Sarah, the executive pastry chef, calls great food “sex on a plate”. I’m older and think of love. Come to think of it, I’ve always thought of love.

A brief note – although I’ve made this sauce a million times, I. Have. Never. Taken. A. Picture. What’s wrong with me. So, after a good bit of research using Bing Image Search, I’m prevailing on the kindness of my blogging friends and using this lovely shot – which looks a great deal like what your own finished labor of love will look like. It’s from the nice peeps at What’s For Eats. Their recipe, which is also a good’un, is here.

Are you hungry yet?


Leave a Comment

How We Know it’s Spring

Listen with webreader

It’s pretty easy to tell when Spring starts and everybody has their own way of determining their personal Spring start-date. For some people, it’s the beginning of baseball season – and we’re not averse to that – but for some, it’s the opening of Schue’s Farmer’s Stand in Stanwood, WA. Oh – if you’d like to see *why* this says Spring to me, here’s a picture I took of the inside of the farmstand on their opening day this year, 2011. Click the picture to see the whole thing.

Schuh's Farmstand, Stanwood, WA., April 1, 2011 - Spring!

Schue’s is a family stand that’s been around for generations. Jennifer, the current proprieter, is a sweet, funny woman who demonstrates a classic Newtonian law – A Body at Rest Tends to Remain at Rest – a Body in Motion Tends to Remain in Motion. In case you were wondering, Jennifer is rarely at rest.

Here’s a link to Festival of Farms, which features Schue’s (they don’t have a Web site yet, and that’s. . .OK).

These are folks who’ve been in the business of growing (and raising) food for generations. They’re hard-working, generous and funny.

Please support them, and our other local farmers. Try a Farmer’s Market break from the usual harried run of supermarket shopping. Visit a nearby Farmer’s Market. Have a cup of coffee. Visit with the producers. You might even meet a friend, or engage in lively discussion with a neighbor over the nature of different types of tomato. Or – in the case of the Ballard (WA) Sunday Market, have an awesome slice of pizza from Veraci Pizza’s lil wood-fired ovens.

Let us know how you mark the entrance of Spring.  Is there a special food or drink that says Spring to you?

Leave a Comment

Manners Around the World – With Thanks to the Family Education Network

Listen with webreader

Whether you eat umeboshi or White Castle, whether your idea of a feast is a noma choba or a barbeque, whether you use a fork or chopsticks, there’s one thing we can all agree on – manners at the dinner table are consistent – after all, good manners are good manners, aren’t they?

Hmmmm. . .well, maybe that’s just a bit provincial. As the raconteur, chef and bon vivant Anthony Bourdain might say, “Suum Cuique”. Mr. Bourdain is not only a great chef and entertainer, he’s a bit of a classicist – what he’s telling you (in Latin, of course) is “To Each Their Own”.

Every culture in the world has its own standards for dining manners. If you think you’re an international Emily Post of the dinner table, then take a whirl at this simple test and see how your International Culinary IQ measures up.

With thanks to the nice people at The Family Education Network (http://www.fekids.com)

Click here to start: Start the Test!

Leave a Comment

Spaghetti Ticino – a Love Story

Listen with webreader

Analog cooking - a primitive recipe card, found by archaeologists

In which I was Tricked into Becoming a Cook

My wife is much smarter than I am – and for that, I am extremely grateful, even though her extreme brainy-ness can sometimes lead me around by the nose.

When we were first courting, back in the late Neolithic Era, she observed that my culinary expertise was limited to three items:

  1. Tuna fish salad. OK, all my friends said my tuna fish salad was the best tuna fish salad in the world, but it was tuna fish salad, plain and simple
  2. Hamburgers. OK, all my friends said my burgers were the best burgers in the world, but they were burgers
  3. Grilled cheese sandwiches. OK, all my friends – well, you know the rest

I was justifiably proud of these marginal culinary accomplishments, as my guy friends’ expertise at cooking was limited to food groups with names like Campbell’s, Princes, and Kraft.

One day, after we’d gone out together for perhaps 3 months or so, she announced that she’d like to cook me dinner. I took this as an expression of love – and it may well have been – but it was also an expression of “IF I HAVE TO EAT ONE MORE TUNA FISH SANDWICH, I AM GOING TO SWIM AWAY FOREVER” likely combined with, “IF WE HAVE TO EAT OUT ONE MORE TIME, YOU WILL HAVE TO SELL YOUR CAR.”

Told you she was smart.

So, she told me she was making spaghetti. That was cool. I knew how to make spaghetti. Boil pasta, pour sauce from jar on top, shake cheese on top from little green tube. Done. Spaghetti. I asked if I could help – she said,”No, I’ve got it, you just sit back and enjoy.” Hmmm. . .OK. I poured wine for us and we drank it in the kitchen of my small Somerville, MA. apartment whilst she moved briskly about, chopping things (do you have a cutting board? Ummmm. . .isn’t the counter a cutting board, too??), combining, moving, pouring, shaking.

I was entranced by the spectacle. Of course, she could have been preparing a dish of pea gravel on wood chips and I would have been entranced by her moving about. That’s just how it was.

At some point, she announced, “OK, I think it’s ready. Get a couple of plates and warm them up.” Warm the plates? Heat, heat, heat – ah! I ran them under hot running water, then dried ’em off. Mission accomplished. My work was done, except for pouring more wine.

Then we sat down to table. There were candles, folded napkins, forks, spoons, knives – water in glasses!! A large bowl filled with an attractive mixture of greens that was something she called a “salad”. Funny little slices of bread that looked like they came from a loaf designed for dwarves (I later learned this was called a “baguette”).

And the main course!! As soon as it hit the table, I inhaled its fragrance and my mouth began watering. With some restraint, I waited until we’d toasted each other’s health (another nifty ritual learned from my smart wife). Then dug in.

O M G!!

What on Earth was this? It was divine, it had lots of flavors, but they didn’t compete – they were just kind of cozy with each other. The textures of the ham (she called it “prosciutto”) and vegetables blended perfectly together in a smooth, silky sauce.

“Whd oo call ‘es” I mumbled between mouthfuls. “What?” she asked, looking at me sharply, but clearly enjoying my non-stop fork-to-mouth action. “Er, what do you call this?” I said, convulsively swallowing the last savory morsel and looking over towards the stove to see if there might be more.

“Oh, it’s called spaghetti ticino,” she said. “Spaghetti ticino,” I parroted. “It’s really good.”

“Thanks, honey, it takes a little effort, but it’s worth it, isn’t it?” “Absolutely,” I said, thinking that it had taken very little effort on my part. And yet. . .

“How do you make it,” I asked.

“Oh, it’s a pretty complicated recipe,” she said, smiling gently.

“I like complicated things,” I asserted.

“I really think you’d want to start with something a lot simpler to make, and work your way up,” she said.

“No. I want to make this. I can totally make this,”

“Well, if you want to try, here’s the recipe I have for it,” she said, pulling out a little 3×5 index card covered in ingredients and arcane instructions. It was like finding a card written in Sumerian, but – well, I knew what most of the words meant, and I was sure I could figure it out.

I spent the next few days acquiring ingredients. I soon realized I had nothing, so I went to the Star market and began acquiring the basics.

Once I had everything, I spent some time with the little recipe card. I pondered it, thinking it through, trying to grok its essence (as we used to say back then). When I felt all grokked up, I started.Everything seemed to go quite nicely, although the spaghetti appeared to be congealing into a unified mass of starchy strands.

Serving time. Voila! I’d invited her over for dinner and she’d accepted – this was going to be a surprise. And it was. “What is this,” she asked, picking idly with her fork at a gooey mass of congealed pasta that lay submerged under a glutinous sauce that resembled library paste.

“It’s spaghetti ticino,” I said brightly, proud of my accomplishment, but feeling that I may perhaps not have entirely achieved my objective.

With a fine display of sportsmanship, she chewed her way through it, pausing only for frequent refills of wine. “How do you like it,” I said, quivering with anticipation.

“It’s,” and there was a long pause during which I could actually feel her brain searching for words, “pretty awful, but not bad for a first try,”.

“OK, well, it was my first try, but next time it’ll be wonderful,” I said, rising to the challenge.

“OK,” she said

“OK,” I said, pushing away my half-eaten plate and wondering if we should go out and have a little more food at a restaurant.

I spent much of my spare time perfecting my chops on that recipe and grew quite fond of cutting, chopping, organizing, mixing, thinking, tasting, smelling, touching – the whole range of things you do to create good food. And once I’d mastered that dish, I thought “that was fun,” and moved on to another. And another.

A Long Time Later

It’s over 30 years later. We’re still married. Although my wife is an outstanding cook, I do most of the cooking around home, because – well, because I really like it. Her Tom Sawyer-like ploy with the spaghetti ticino was a complete success (“Oh, I don’t know if you should try that – it takes experience and skill to cook something like that”). To this day, she swears she had no ulterior motive when she explained how complicated it was to make the dish, and how she just didn’t want me to frustrate myself in the world of cookery. Like I said – she’s a lot smarter than I am.

The Recipe – Spaghetti Ticino

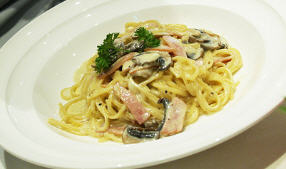
I haven't made this today, and it doesn't seem to exist online, but this is very close to what it should look like

I’d like to note that I have so far been unable to locate this recipe (perhaps because I’m spelling Ticino wrong) online. Nonetheless, it’s a lovely dish, albeit a bit on the dense side – taken from an era when Julia Child’s star was beginning to ascend.

Ingredients (serves 2-4 depending on hunger levels and whether served as a course in a larger meal)

  • 3/4 lb. crimini mushrooms
  • 3 TB. butter
  • 1/4 Cup finely minced scallion, both white and green parts, plus 1 TB.
  • 2 garlic cloves, finely minced or pressed
  • 1 Cup coarsely diced prosciutto
  • 1.5 Cups heavy cream
  • 1/2 Cup grated Reggiano Parmesan cheese plus additional cheese for sprinkling on top
  • 1 TB. finely minced parsley for sprinkling on top
  • 8 oz. spaghetti. You could use linguine, but spaghetti is the way I’ve always done this dish – I think the shape just works well with the sauce.
  • Salt, freshly ground pepper to taste

Preparation

Fill a large pot with water and salt (I use about 1 TB salt / half gallon of water), and set to boil.

Clean and slice mushrooms. Today, I might use a mushroom brush or even just rub the mushroom skin with my fingers to remove any clinging bits of twigs or dirt. Heat a 10-12″ saute pan, then add 3 TB. butter, swirling and shaking until the butter stops foaming. Add the sliced mushrooms, cooking them on medium heat (you don’t want to brown them) for a few minutes.

Add the 1/4 Cup scallions and garlic, and cook for another 2 minutes or so until they are softened and fragrant.

In a separate small skillet heat 2 TB. butter. Add the prosciutto, shake it and toss it – or stir thoroughly. Cover and cook for five minutes over low-to-medium heat, until the prosciutto is softened and beginning to crisp just a bit. When this happens, remove the skillet from the heat.

Add spaghetti to your boiling water. While the spaghetti is cooking, add cream to your cooked mushroom mixture. Cook over medium to medium-high heat, stirring constantly and scraping from the bottom to prevent any burning. The sauce should reduce by about a half. This should take about 5 minutes or so. Once it’s reduced, add the prosciutto and fold into the sauce. Taste and correct for seasonings. That means add salt and pepper to your taste.

Drain the spaghetti (if a little bit of water clings to the spaghetti, that’s fine). Mix the drained spaghetti with the sauce and serve immediately in warmed bowls, sprinkling with the remaining TB of finely minced scallion, the parsley and additional cheese.

This is a simple – some might even say primitive – recipe, but it works. We fed this to our kids when they were little, they ask us to make it now that they’re grown. We eat it ourselves occasionally, but with a bit more caution than in days of yore.

And – it’s such a great jumping off spot for your own creativity. There are countless variations on this theme – give it a try. It’s a complicated dish and. . .well, it’s just pretty tough to make. . .but if you really want to try it. . . 🙂

I’ve kept the recipe card for over 30 years – it’s a part of our family history.

Comments (8)

Why Avgolemono Soup is the Perfect Food

Listen with webreader

The Battleground of Making Food that Everybody in Your Family Will Eat

At least – in days gone by – it was in our family. Early on our daughter Amy decided to become a vegetarian. Our son Brendan was constantly hungry, but he wanted meat meat meat and starch starch starch – and he wanted it now. Bonney and I were omnivores, but we definitely had preferences.

As I fixed food for these three divergent appetites, I longed for the days of yore, when my mother would say, “If you don’t like what’s on the table, then I guess dinner’s over for you,” and my father would say “your Mother worked to put that food on the table, I worked to buy it, now you work at eating it.” Nobody disagreed much with either of these forces of Nature in the old days. Kids (and parents) today are a little different in their relationships around food.

So I searched and searched, trying this, trying that – trying anything I could to find a food that was reasonably nourishing, and would appeal to everybody in our family. Today, we have legions of experts who want to tell us how to eat, what to eat, when to eat. . .it constantly astonishes me that thousands of generations of humanity have somehow managed to struggle their way forward without benefit of these dietary mavens.

So – I rejected the notion of expertized food and turned to traditional cultures’ cuisines, thinking that these were recipes that had evolved over (sometimes) centuries and were likely to be widely accepted. I mean – otherwise, they wouldn’t have continued to evolve, right? 🙂

One day, some time ago, I had lunch at a little local Greek eatery – Costas Opa in the Fremont district of Seattle. Costas Opa has been dishing up classic traditional Greek food along with belly dancing and live Greek music since 1981 – their longevity alone says something about their food to me. They’d only been in business a paltry 10 years or so when I discovered them.

I enjoyed their usual assortment of Greek food – which I find one of the most comforting cuisines to eat – spanikopita, stifado, moussaka, souvlaki – I loved ’em all! Then, by chance, I ordered one of their combo plates. It came with a little cup of soup – undistinguished, maybe a little yellow in color, with a haphazard sprinkling of finely minced parsley on top. Spoonful. Smile. Big smile. Another spoonful. Cup gone, considered ordering bowl, but was able to restrain myself with some effort.

“What’s this,” I asked my server, pointing at the little licked-empty cup. “Avgolemon soup,” he said, “It’s a classic Greek dish – everybody eats it.” OK, well, now I was a part of EVERYBODY. Excellent!!

I went back to work, but kept musing on this soup. It was chicken broth, but our daughter wasn’t *that* strict a vegetarian. It has a powerful flavor kick that would probably appeal to our son. And, I mused, if made with the right amount of rice, it would be almost like a congee – a very simple congee. I knew my wife would like it – it was simple and clean tasting – and I already knew I loved it.

So – an Aha! moment – I began researching it. Wow! There are a *lot* of recipes for Avgolemono (today, a simple Bing search on “Avgolemono recipe” delivers over 87.000 hits!!) – ranging from incredibly simple to feast-like extravaganzas. I decided to give these latter a miss – I was going for simple, clean and filled with bright flavor.

Fast forward. There. No, a little faster. I’ve been making this soup for well over a decade in this form. It’s the single thing I know I can make that my entire family – and now, our extended family – will eat without kvetching. In fact, both our children – now fully grown “novice adults”, as I think of them – sometimes come by and ask me to make this soup. That warms the cockles of my heart.

Avgolemono Soup – the Recipe

As I’ve come to make it, this soup is extremely fast and easy to prepare, uses but four ingredients, a single aromatic and is both comforting, filling and nourishing.

Ingredients (for four to six servings)

  • 64 oz rich chicken broth. If I don’t have any homemade chicken broth around, I find the broth that comes in the 32 ounce steri-pak cardboard boxes is an excellent and nearly-indistinguishable substitute.
  • 1.5 C medium grain white rice
  • 4 whole large eggs, and 3 yolks, reserving the whites for another purpose. An egg-white omelette, for example! For an excellent overview on separating eggs, click here.
  • Juice from 4 large, juicy lemons
  • 1 tsp. lemon zest
  • 1/4 tsp. nutmeg
  • (Optional: finely minced parsley or a little snipped fresh chive, or a few shreds of dill weed as a garnish)

Preparation

Juice the lemons, zest a teaspoonful of zest and mix together in a large bowl. Add the eggs, egg yolks and nutmeg to the lemon juice/zest and beat very thoroughly with a whisk or fork. Set aside.

Add the broth to a pot, and add the rice to the broth. Bring the broth to a very low boil, then reduce to a simmer and simmer uncovered until the rice is just cooked. The soup will thicken up a bit as the rice cooks. When the rice is cooked take the soup off the heat, take a ladle and put a ladle’s worth of soup into the egg/lemon mix, mixing briskly with a fork. This tempers the eggs and will help prevent their curdling when you add the lemon/egg mix back to the stock.

Add the lemon/egg/nutmeg mix to the stock, stirring gently. It’s important that the stock not be boiling at all, not even really simmering – you don’t want the eggs to curdle, you want them to simple meld with the stock, creating a smooth, creamy texture. Don’t worry if you get a few strands of curdled egg at first. After a couple of times, you’ll end up with a totally silky-textured broth with no curdled eggs at all. Promise!!

That’s it. You’re done. Serve in warmed bowls and, if you like, garnish with some of the garnishes above. We eat this with a slice or two of a nice crusty bread. If you’d like to drink wine with your soup – try a lighter wine – say, a decent Pinot Grigio.

Tip: My cheater tip for when I don’t have homemade broth – I use Better than Bouillon (because it is!). Add about 1 Tablespoon to the broth from the steri-paks if you like for a much richer stock flavor. Or use your own stock.

I have yet to meet anybody who doesn’t enjoy this soup. It’s about as simple as a soup can get, yet the few flavors merge together to create a complex, perfect taste that’s bright and clean, with a variety of textures from the silkiness of the broth to the very slight bite of the rice.

If you decide to try it, please drop me a comment and let me know. If you find anybody who just flat doesn’t like this soup, I have the number of an excellent therapist. 🙂

Comments (5)

Salvation and Banana Bread in New Orleans

Listen with webreader

At the end of August, 2001, a disaster occurred. In the grand scheme of things, it was nothing compared to the national disaster that followed the next month, but it shook my world just as profoundly.

In 1998 I had moved from NYC to New Orleans, and I had brought my freelance job with HarperAudio with me. It was a pretty good gig. I abridged books for audio release on cassette. Back in the day of cassette tapes, most titles had to be abridged to fit the tape length.

In addition, I had almost immediately found a working relationship with a local glass artist doing architectural glass etching. These two revenue streams were my sole source of income.

At the end of August, 2001, they both collapsed. My relationship with the glass artist foundered on poorly communicated expectations, and my editor at HarperAudio suddenly quit his job in a fit of pique, claiming he wasn’t appreciated by his co-workers. His replacement was less than thrilled about working with her predecessor’s stable of freelancers and let me know it.

When the phone lines were finally clear after 9/11, I discovered my editor’s phone number was now connected to a fax line. My calls to the general number went unanswered.

I was in shock.

For two weeks I floundered, unable to grasp the enormity of suddenly having no income – and no unemployment benefits.

When the towers fell, the landscape of the world changed. In New Orleans, tourism, a prime driver of the economy, vanished with the grounding of the airlines and took years to recover. I hadn’t held a conventional job in years, my resume was a patchwork of completely unrelated positions, and the New Orleans job market had evaporated.

My salvation arrived in the guise of an invitation to Thanksgiving dinner. My parents live 1,000 miles away, my brother lives in Alaska, and we had stopped having regular celebrations years before, so I often found myself “homeless” for Thanksgiving. I embraced this invitation with pleasure, finally feeling that I had something to focus my energies on.

The Joy of Baking – and the Beginning of a Business
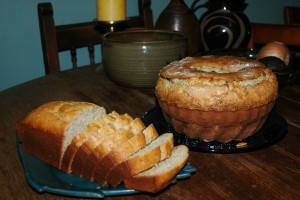
I have always loved baking. As a child, I helped my mother make bread, and took over that job as a teenager. I delighted in trying new recipes and bringing my artistic inclinations to the process. I especially loved making challah, with its intricate braids.

I mostly gave up bread baking in college, but continued to make cookies and quick breads for any party to which I was invited. My Christmas parties were the stuff of legend, with an almost overwhelming number and variety of cookies.

For this Thanksgiving gathering, I decided to bring an apple pie. And therein lay my salvation.

I have made many pies over the years, but I always like to try something new, to refine the process. This time, I used two kinds of apples—galas and fujis—and layered them in the pie shell. I seasoned them with traditional ingredients like cinnamon and sugar, and I piled them as high as I could possibly get them.

As I like to do, I poured heavy cream into the center of the pie, through a hole cut in the top crust.  I decorated the top of the pie with cutouts and pastry leaves. It was an epic pie, weighing over five pounds.

At the afternoon feast, I had told the assembled company my employment woes – they were entirely sympathetic. There was a bit of brainstorming, but nothing really solid had come out of it.

I Sell My Pies

Then dessert was served. My pie was exclaimed over, admired, and devoured. And then my hostess turned to me and said “you should sell these.” The other guests chimed in, saying they would love to be able to order a pie from me for special occasions, and they were sure their friends would as well.

I was dumbfounded and amazed. Could I really make a living making pies for people? I decided to give it a try. The assembled company thought $25 per pie was a reasonable price, and I got their orders then and there for five pies. They promised to spread the word.

I went home and made up some flyers. With just this word-of-mouth start, I had as many orders as I could handle for the holiday season. It was a lot of hard work, but the satisfaction was worth it. Then Christmas was over, and demand for apple pies slowed considerably.

I began to think of other baked goods I could make.

The Teachings of Steve the Cake Man

During my time with the glass artist, Steve the Cake Man visited our little store-front shop several times a week. Steve was a cheerful, energetic man who came through the neighborhood carrying a large round metal tray bearing individually wrapped slices of cake.

They were generously portioned and absolutely decadent—especially his red velvet and carrot cakes. At $2 or $3 per slice, they were also affordable and a welcome treat. Steve baked cakes every night and walked his beat during the day, covering a large area of New Orleans.

Why couldn’t I do something like that? Cakes weren’t my specialty, and I wouldn’t want to compete with Steve anyway. What could I make that could be served by the slice?

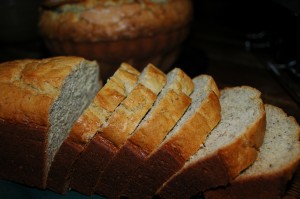
And I thought about banana bread. I had been perfecting my recipe for years (it’s deceptively simple), and everyone loved it—just sweet enough, with a little tang, rich and moist, with a creamy top crust. And then there was my almond poppy seed bread—rich and dense, almost like a pound cake, buttery and almond-y, with a crunchy sugar crust.

I decided to bake banana bread and poppy seed bread.

In my little kitchen at the back of my shotgun double apartment, I started baking. For my first foray, I made three loaves of banana bread and four of poppy seed. I sliced them about an inch thick, packaged them up in cling wrap, and designed labels with a list of ingredients.

I created a logo and a name, From Scratch, and printed them out on colored paper. I attached a label to each piece with double sided tape, found a wicker market basket in my closet and lined it with a tea towel and loaded it up. OK, I was ready to go.

That first day was a revelation. I started on Magazine Street, a seven mile long New Orleans’ street lined with areas of small shops and business districts alternating with residential. I went into galleries and gift shops, rug stores and antique shops, stores for clothing and furniture and jewelry. My pitch was simple – a gorgeous, perfectly fresh slice of banana bread or poppy seed cake for a buck.

Some of the clerks and owners were cool to me, but the overwhelming majority was delighted to meet me and eager to try my wares. I had decided on a price of $1.00 per slice, thinking it was an amount people would find easy to spend on a little snack. This proved to be exactly right.

At the end of the day, I was exhausted and my feet hurt, but my basket was empty and I had a wad of bills in my pocket. I went home and did some calculations. If I baked every other day and sold the following day, I could make it work.

I was elated—here was something I could do that I loved, and that provided me with instant gratification. The looks on my customers’ faces when they tried my bread gave me a needed boost to the ego.

As the weeks went on, I added shops in the French Quarter to my route, and then the vendors of the French Market.  I discovered an added benefit to my new business: social contact. I became part of the life of the neighborhood – the shopkeepers and vendors looked forward to my visits.

I have always been an initially shy person—I find it difficult to start talking to people I don’t know in most general social settings. I’m pretty good at making conversation with people who approach me, but it’s a real struggle for me to initiate contact.

This new venture gave me an opportunity to talk with a wide variety of people with whom I would never have otherwise made contact. Even though I was terrified every time I went into a new place, I managed to overcome my fears and soon discovered that my customers opened up to me on a far more personal level than they would have if I had been a customer of theirs. I became part of the life of the neighborhood.

Eventually, I had to gave up the Magazine Street route—it was simply too long and time consuming—and concentrated on New Orleans’ French Quarter. I developed a routine that took me along an established route to repeat customers and soon learned peoples’ favorites.

A chance friendship with a man in my neighborhood who had bought an old chocolate factory to convert into a home provided me with several ten pound blocks of chocolate, and I began adding it to my banana bread, along with walnuts. It was a hit, and I started looking for other ways to use chocolate.

Soon I began making chocolate candies: chocolate-covered pecan clusters, peanut-butter cups, crunchy peanut butter balls, molded chocolates with mint or orange flavors, and seasonal chocolates such as molded heart shapes for Valentines Day or chocolate-covered strawberries during Pontchatoula strawberry season.

These were a huge hit, but became difficult to manage during the hot summer months, when it was a challenge to keep them from melting in the brutal heat. I kept most of my stock in a cooler in my car and made frequent trips back to it to refill my basket, but it was tricky none-the-less.

I experimented with adding fruit to the basic poppy seed bread recipe, with mixed results, and started selling mint chocolate chip cookies as well. I labeled the ones with walnuts with a little male symbol, and the ones without with a female one. It never failed to amuse people once they figured it out.

I continued my little business for a year and a half, walking the streets of New Orleans with my basket of treats, spending time chatting with my customers, sometimes battling heat waves and thunderstorms. It was often exhausting and always challenging

But it worked, and it kept the rent paid and the lights on.

The Joy of Baking – the Agony of Wrapping

Eventually, however, the hours took their toll. I loved the baking, I loved the selling. What I didn’t love was the hours it took to package everything up. I tried a number of strategies, including replacing the plastic wrap with individual bags, but it was still time-consuming and mind-numbingly tedious.

I couldn’t afford to hire an assistant without raising my prices and I didn’t want to do that. Many of my customers lived as close to the edge as I did, and they really appreciated being able to get something home-made for $1.00. An informal poll showed some resistance to paying any more, and I didn’t want to have to deal with making change.

So it was that in February of 2003, right in the middle of Mardi Gras, I hung up my apron and started driving a taxi for United Cab, a gig that lasted until 2007. I have since, on occasion, baked up a few batches of bread or some cookies, packaged them up, and gone back on the street, but that part of my life is over and I can’t manage to go back to it. To this day, however, I still get stopped on the street by old customers wanting to know when I’m coming back.

Oh – the banana bread recipe? Well, here it is and may you get much joy from it and the Bonus Poppy Seed Bread recipe that follows.

Nevenah’s Banana Bread
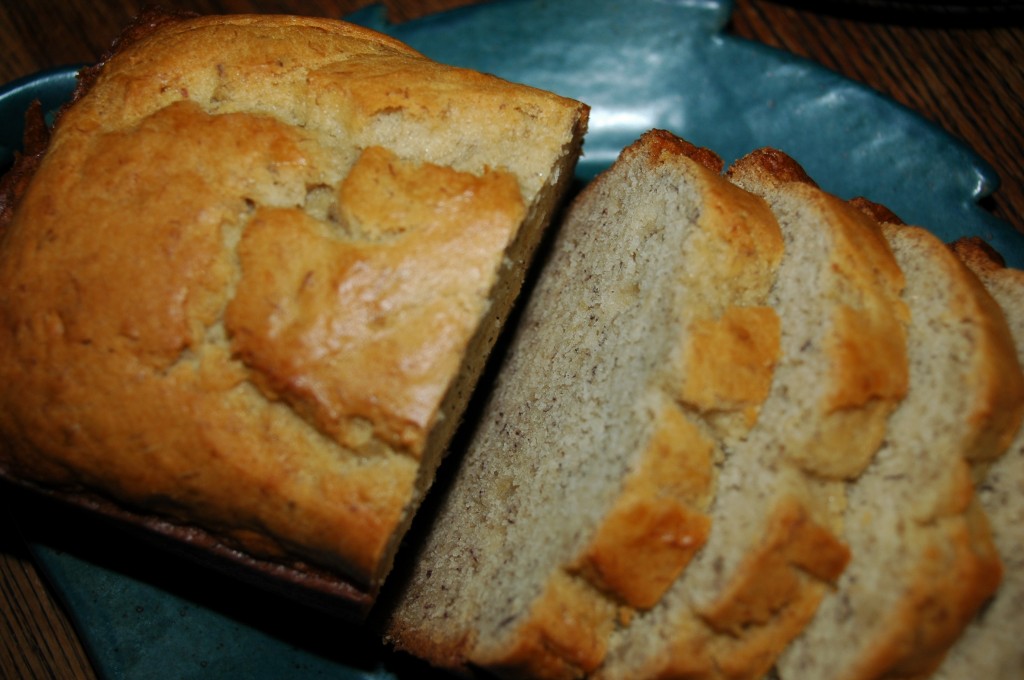
Makes 3 loaves

Ingredients

  • 1 C sweet butter, softened
  • 2 C sugar
  • 4 eggs
  • 5 over-ripe bananas, mashed thoroughly
  • 4 C flour
  • 2 tsp baking soda
  • ½ tsp salt
  • 6 T sour cream
  • milk (as needed for consistency)

Preparation

Cream together the butter and sugar, beating until light and fluffy. Gradually add the eggs, mixing thoroughly, then gradually add the mashed banana. Don’t worry if your nice, smooth mixture becomes watery and separated at this point, just mix well.

Sift together all the dry ingredients, and gradually add them to the wet, stirring. Add the sour cream after all the flour has been incorporated, making sure to mix completely.

If your batter is very thick, add a little milk. It should be thick enough to retain some shape when spooned on top of itself, but not so thick that it won’t (mostly) settle when tapped. This is the stage that takes a bit of tinkering to get just right.

Tip: If you want to add ground walnuts or other ingredients, this is the time to do it; fold them in with a spoon or rubber spatula. I have found that mini chocolate chips work the best if you want to add chocolate, as they are light enough to not weigh the batter down and make it collapse.

Grease three standard loaf pans and portion the batter between them. You want to leave about 1 inch to the top of the pan—don’t worry if it’s a little lower or higher, just don’t fill all the way to the top.

Bake in a pre-heated 325° oven for 1 hour, or until a toothpick inserted in the center comes out mostly clean.

Tip: The top will usually crack down the middle, stick the toothpick in there. If it comes out with just a few crumbs sticking to it, that’s perfect. The loaves will set during cooling, and the bread will be moist. It can take a few tries to get this exactly right.

Set the pans on cooling racks. Let rest at least 15 minutes before slicing. You can leave the bread in the pan and remove slices as with a pie, or you can remove the bread from the pan and slice it on a cutting board.

Tip: I like to use a chef’s knife rather than a bread knife – banana bread is more like a cake. When eaten right away, the top crust will have a lovely crispness. After a while, it softens and becomes creamy.

Covered with either aluminum foil or plastic wrap,this bread keeps for several days at room temperature. Refrigerating makes the bread denser.

Tip: For loaves to give away, after completely cooling, wrap them in plastic wrap. Another option – you can bake loaves as gifts in disposable aluminum pans with snap-on plastic lids.

Bonus Recipe: Nevenah’s Poppy Seed Bread
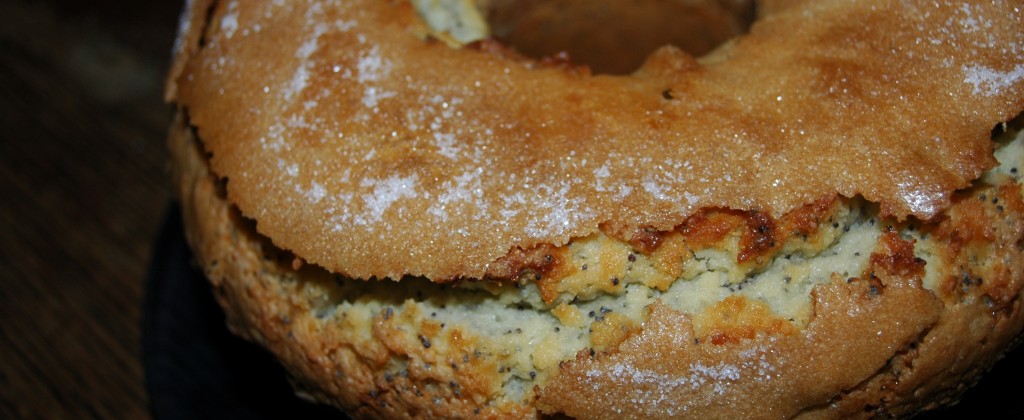
Ingredients

  • 3 C flour
  • 2 ½ C sugar
  • 1 ½ tsp baking powder
  • 1 ½ tsp salt
  • 3 T poppy seeds
  • 1 ½ C milk
  • 1 1/8 C vegetable oil
  • 3 eggs, lightly beaten
  • 1 ½ tsp each vanilla extract, almond extract, and butter flavoring

Combine the wet ingredients in a bowl. Combine the dry ingredients in a larger bowl and make a well in them. Pour the wet mixture into the flour mixture and beat until smooth, making sure to scrape the sides and bottom of the bowl.

Grease and flour 2 regular loaf pans, plus one or two mini loaf pans. The number of loaves varies depending on the size of your pans, so I always have several mini loaf pans on hand for any extra batter. Pour the batter in the pans, leaving at least 1” of room from the top. Do not overfill! Sprinkle the top of the batter with sugar, about 1T per loaf.

Bake in a preheated 350° oven for 1 ½ hours, plus or minus 10 minutes. Mini loaves should be checked after 1 hr. Bread is done when a knife or toothpick inserted in the center comes out clean. Cool on racks.

Tip: You can make this in a Bundt pan instead of bread pans, but make sure to grease and flour the pan thoroughly.

Tip: Light colored pans work better than dark ones, which tend to make the bottom crust dry and overdone. Disposable foil pans work best of all.

About the Author

Nevenah Smith is a New Orleans artisan, art-fair roadie, writer and baker. You can find her unique art at www.nevenah.weebly.com or www.nevenah.etsy.com.

Comments (9)

My father’s latkes

Listen with webreader

Cast iron is a good way to go

Latkes are potato pancakes. They’re a traditional food amongst many people, including Ashkenazi Jews – that would be both my parents. They’re generally eaten around Hanukkah, where the oil they’re cooked in symbolizes a miracle that was supposed to have happened a long time ago in the Middle East during a period when people were fighting and killing one another. We could probably use a few miracles in that area today.

In our household, latkes weren’t specifically a holiday food. They were just something my father would make whenever he had a mind to, which was pretty often, for example when his kids would hang on his arms and plead for latkes. They can be made as either an appetizer to a full meal, or – as a full breakfast meal in themselves with other breakfast-y things like ham, bacon, sausage and eggs. . .

I first learned to cook from my father, which was pretty unusual back in those days. He was a businessman, but he loved eating! Trained as an organic chemist, he also loved figuring things out – things like recipes were second nature to him.

I got older. Got married. Moved to Seattle. Kept cooking, couldn’t figure out *exactly* what it was that Pop did to make his latkes taste so damn’ good.

Pop got older. Ultimately, after Mom passed away, he moved from Massachusetts to live with our family in Seattle, where he stayed for fourteen years. During this time, he made latkes for us on a regular basis, and I got to check out his chops with a more adult perspective.

This is how he made them – and I found them perfect. Lacy, crisp, stunningly simple and painfully good.

I suggest you follow this particular recipe fairly closely the first time you try it out, then you’ll have a better feel for exactly the proportions of onion and salt that will bring you maximum joy.

Pop’s Latkes

This recipe will make enough latkes to fill 4-5 people up quite nicely, or 8 as a side dish with, say, ham and eggs. And – you’re right – we weren’t particularly observant Jews, certainly not where kosher dietary laws were concerned. Food was food in my folks’ book – and mine as well.

Ingredients

  • About 2 lbs Yukon Gold potatoes peeled. Feeling adventurous? Experiment by using about 1.5 lbs of potatoes and a half pound of carrot, parsnip, sweet potato, yam, or even zucchini. These make a nice and flavorful addition, but are generally considered rank heresy in our household. So – if you haven’t made latkes before, do me a favor. Just use potatoes, then decide later if you want to try alternate ingredients. 🙂
  • About a good half cup of grated onion (more on grating in a minute)
  • Two large eggs, lightly beaten
  • A teaspoon of fine sea salt. Or table salt – I defy you to tell the difference in a blind taste test for this particular dish! 🙂
  • Coarse Kosher (or sea) salt, for sprinkling on top of the latkes when they’re done
  • A Tablespoon and a half of flour
  • Large bowl filled with cold water into which you’ve squeezed the juice of half a juicy lemon.
  • Enough peanut oil (or vegetable oil or grapeseed oil) to fill your large 10″ ( or better, 12″) frypan about 1/2″ deep.
  • A box grater. This is a critical piece of kitchen equipment. Do not use a food processor – you won’t get the same results.

Preparation  – the Grater’s the Thing

Preheat your oven to 350 and pop a cookie sheet with a wire rack into it. Put a couple of paper towels on the rack. They will not burn.

This will hold your latkes in a warm, crisp state as you make ’em. Generally, whenever I make latkes, they seem to vanish – it’s like a magic trick – they disappear before I can get ’em to the oven. But you’ve gotta try, right??

These old box graters work really well

Classic old-fashioned box grater

  • Peel the potatoes and grate them on the coarse openings of a standard kitchen box grater. In time, you’ll learn to do this with minimal scarring. As the potatoes collect inside the grater, pop them out and into the bowl of cold water with lemon juice. This keeps them from browning and helps them crisp up a bit more.
  • Use a white onion. Grate it against the small holes of your box grater. This can take a little patience. You’ll end up with a kind of particulate mush. You want a solid half-cup of this particulate mush, which is in the range of about half a good sized white onion.
  • Drain the shredded potatoes, then put them in a large clean kitchen cloth and squeeze the bejeezus out of them, twisting the cloth tightly to squeeze out as much liquid as possible. Or, you could use a salad spinner and finish drying ’em with paper towels.

Squeeze 'em Dry!

  • Put the mostly-dried potato shreds into a bowl, add the mushy particular onion bits, the salt, the two beaten eggs, the flour, and mix gently but thoroughly.
  • Pour about 1/2″ oil into your large fry pan. . .let me digress: If you have one of those electric frypans – I have an old Farberware that used to belong to my Pop – they work better for any kind of quasi-deep frying because they’ll keep the hot oil or fat at a constant temperature without having to fiddle with the stove.
  • Heat ’til it’s shimmering, but not close to smoking. If you take a spoonful of the potato mixture and plop it into the oil, it should begin sizzling nicely almost immediately. Cook this spoonful and eat it. People will crowd around asking for their latkes, but the chef always gets the tester.
  • Take a large spoonful of the potato mixture and pour/scrape it into the oil. It will flatten out and form a circle. Approximately! You can make 3–4-5 of these at once depending on the size of your frypan, but do not crowd the latkes. Crowding the latkes just makes them irritable, and generates more steam than heat.
  • When the latkes begin to bubble on top, slide a spatula under them and gently turn them over, cooking for another minute or so until they’re browned lightly on both sides.
  • Transfer batch of latkes to a plate with paper towels to absorb the oil, sprinkle with just a pinch of coarse salt (Kosher or coarse sea salt). Have one of your kitchen minions take the plate and gently move the latkes to the wire rack in the stove. In my experience, this is where the greatest inventory shrinkage occurs, so you may want to do this yourself, or just put them directly in the stove.
  • When the oil’s come back up to temperature, repeat until you’ve used all your potato mixture. Weep that you did not make more. If you’re not using an electric fry pan, keep adjusting the heat so it stays approximately the same. Depending on the size of your pan and the heat source, you may need to turn it down a little or up a little.

Serve immediately. Our daughter has discovered that you can put latkes wrapped in paper towels in an airtight plastic container and they’ll keep well enough to reheat in the stove for a day or two – but they’re really not the same.

You’ve made your latke, you’ve salted your latke – now what do you put on top of your latke?

This is a question that’s caused arguments for generations. It’s much like the question about borscht: sweet and sour or tomato, garlic and bay? I can only say let your conscience be your guide – I’ve included a number of traditional toppings, but me – I just like ’em straight out of the sizzling oil, with a little pinch of coarse salt. Ultimate Nom! After all, these are finger foods, and are definitely improved with condiments. I just happen to love the simple, pure taste of the primary ingredients.

Many people who eat latkes as a traditional Hanukkah dish eat them for the eight nights of Hanukkah, so it’s clear a little variety might be in order! Bring on the condiments!

Traditional Toppings for Latkes

  • Applesauce – the King of the sweet toppings
  • Sour cream (or plain Greek yogurt) – the King of the somewhat more savory toppings
  • Any kind of chutney
  • Caramelized onions or shallot
  • A nice apple or pear compote. A little ginger is excellent in either of these. Compote is grown-up applesauce. Make a pear or apple / ginger compot by coarsely chopping up – wait for it – pear or apple, and adding it to a sauce pan with a tiny bit of water and a little sweetener. Then cook on low heat, stirring from time to time until all the bits soak up the liquid and soften up – usually 8-10 minutes.
  • I have heard of people who put cranberry sauce on their latkes. It’s certainly a great nod to diversity – I’ve never personally tried it, but I would, it sounds like a great blend. Tart-sweet cranberries atop the succulent latke. . .

Comments (2)

Older Posts »