Archive for Uncategorized

Respect your Ingredients – Meyer Lemon Sorbet with Thyme

Listen with webreader

It’s really easy to complexify things.  Over the past few decades, we’ve seen the expertization of everything from gardening to parenting (who knew that you’d need experts to tell you what tone of voice to use when talking with your kids??).

A lot of recipes – and restaurants – also tend to fall into this complexification mode. If it’s not a classic Indian recipe and it has more than about 15 ingredients, then it (generally) falls into this mode. And while I have nothing against awesome technique, I am. . .wary. . .of awesome technologies being put to use in the kitchen. It’s fun to go to a bistro serving the latest in nifty molecular gastronomy – but ultimately, when I’m cooking at home, I want to be able to use the simplest, freshest ingredients in clean, easy dishes that highlight their flavor. And I don’t want to use too many of ’em. One or two ingredients have to be the stars – the others just have to accept that they’re in a supporting role.

As an example – beef brisket. Coarse salt. Fresh ground pepper. Garlic. Onion. Braising liquid. Salt and pepper the beef. Sear the living hell out of it on all sides. Deglaze the searing utensil with some of the braising liquid. Pop the beef, garlic and onion into the braising liquid and braise slowly for a looong time. Slice and let the slices rest in the braising liquid for a bit, then serve, perhaps over egg noodles. That’s pretty easy, and you’ll end up with sheer beefy goodness. Your friends will fight each other for the last little bits.

And – for this post – nothing beats the sheer simplicity of Meyer Lemon Sorbet.

The Recipe

Ingredients (for about a couple of pints’ worth)

  • 1.75 C. Juice from Meyer Lemons (this is about 6-8 lemons)
  • About 2 tablespoons or to taste (my own taste runs to a bit more) finely grated Meyer Lemon zest. I use a microplane grater and can’t recommend it strongly enough. It makes perfect, small zested particles that work beautifully in the sorbet. Note the 5-star rating in Amazon. With 366 customer reviews, that’s pretty amazing, since about 10% of most Amazon reviews are from people who appear to hate almost everything.
  • 1.75 C. mineral water. Or tap water. People use mineral water to lighten up the sorbet – I use it – but I’m not entirely convinced it makes much of a difference.
  • 1.75 C. sugar. Plain, white sugar.
  • A handful of fresh thyme. You do not need to take the extreme step of stripping the tiny thyme leaves from their branches. This is generally to be avoided, as it causes eyestrain and aggravation.

An ice cream maker of some kind, or a large, tall (ideally metal) container. I use a Donvier ice cream maker that I’ve had for almost a decade. Simple, foolproof and inexpensive, but that’s just me.

Preparation

Make a simple syrup. Put the water in a sauce pan and add the sugar. Add your handful of fresh thyme and moosh (technical term) around until it’s covered by the liquid. Bring to a very slow boil, turn down to a simmer, and let simmer for another couple of minutes. Remove from heat and let sit, covered, for about ten minutes. This last part is important – it “steeps” the thyme, like a tea, infusing more of its flavor into the syrup.

Strain the syrup through a fine-mesh sieve into a large bowl – ideally one with a pouring spout and with plenty of room for all the ingredients. Don’t worry if a few random specks of thyme leaf make it past the sieve. I believe that a few flecks of thyme leaf are part of the recipe’s charm and add to its visual appeal.

Cover the bowl and pop it into the refrigerator for at least few hours. TIP: If you’re careful, you can put the covered bowl into your freezer for about 20 minutes or so to chill it down faster. It then needs only an hour or so in the refrigerator.

Take the chilled liquid and process it in your ice cream maker according to directions. Alternatively – put the chilled liquid into a large, tall container, cover and put in your freezer for about 20 minutes. Remove and scrape the sides of the container with a spoon or whisk, stir a little, put back in freezer. Repeat until you get the consistency you want.

Remove the sorbet to a sealed container and leave it in the freezer for a couple of hours. It’s ready.

Some recipes argue for the inclusion of cardamom – while this is an awesome aromatic, to me it just detracts from the zingy citrus delight of the Meyer lemon. Your mileage may vary. Use fresh-ground cardamom if at all possible and start with just a tiny bit – perhaps 1/4 tsp. for this entire recipe – it’s very aromatic and this is supposed to be Meyer Lemon Sorbet, not Cardamom / Meyer Lemon Sorbet. 🙂

Another great herbal aromatic you can use is fresh lavender. Replace the thyme with a half dozen sprigs or so of fresh lavender.

A Sorbet Discovery – Adult Beverages

I was making this sorbet for guests and. . .I couldn’t find my Donvier. I had the little chilling container in our freezer, but the holder and the stirring paddles – mysteriously gone. So, I made do by wrapping the chilling container in a towel, covering it with a plate, and scraping it periodically with a large metal spoon. Worked like a charm.

A couple of friends were hanging out watching me scrape and taste. Bryan, one of our more inventive friends, went over to our small liquor cabinet, rummaged around and came back with a bottle of tequila. “Hey,” he said, his eyes glittering brightly, “I bet this slush thing you’re doing would make a great Margarita.”

We didn’t have the set up for a proper traditional Margarita, so we settled for pouring a couple of ounces of tequila into small Coca-Cola glasses and adding several tablespoons of the not-quite-yet-done sorbet, then stirring gently. Magnificent!! It did make my job more complex, as people caught on and asked if I would fill their glasses with tequila and sorbet, too. So I had to fight them off in order to get a reasonable quantity of the finished product.

And it was worth it. Try it yourself and let me know what you think.

Comments (3)

Contest! The Best (or Worst) Sandwich You’ve Ever Had

Listen with webreader

<Want to enter our contest? Just send your entry to jeffle@caloriefactory.com>

OK, so we were in  a terrific rush. So Bonney’s tummy was feeling a little grumbly. So the streets had no signs on them, making it nigh-impossible to find any of the great restaurants that had been recommendd to us.

Still – eating lunch at an Applebee’s restaurant in La Paz was a catastrophic mistake of the highest order.

I decided a turkey club was harmless. How could you mess up a turkey club sandwich, right? Let me count the ways.

First, the sandwich not only had turkey – foul dry slices from a processed chunk of long-dead meat. It had ham. At least, ham was my best guess for the 3/16″ thick slices of what I assumed was some kind of sandwich meat, glutinous and possibly made from a species of animal not of this Earth.

Then, the bread was toasted until it was so crumbly I ended up having to use a knife and fork to eat a sandwich!! Even then, the toasted bread crumbled wretchedly around the meat, leaving me with a tiny bit of the squamous ham, the long-dead turkey, and, if I were lucky, a tiny bit of bacon. And by bit I mean – like – Bacon Bits.

The cheese was a sharp mis-match – perhaps a smoked provolone. Again, it was difficult to tell it was cheese, let alone what kind of cheese it was. The lettuce was so old it had a picture of a man killing a tiger with a spear on it. And the tomato was. . .sorry, I can’t even talk about the tomato, it filled me with despair – and this in a land where perfect tomatoes were being grown at farms just a few kilometers out of the city.

Binding everything together into a perfect package of putrefaction was about a quarter C. of lightly congealed mayo.

I was famished, but could only eat two small bites before putting down my utensils. No mas. Surrounded by ethnic cuisine of the highest order, was this the best we could do? Tragically, the answer was “yes” – we were just in too much of a rush.

The result? The worst sandwich I have ever eaten in my life.

So, What’s the Contest and How do I Enter?

Calorie Factory is soliciting stories for “Best Sandwich I’ve Ever had (or made)”  OR “Worst Sandwich I’ve Ever Had (or made). The winners will have the pleasure of seeing their entry appear on Calorie Factory’s front page where thousands (OK, dozens, but we’re young!) of readers will get to read your tale.

We love stories and recipes from our readers, so, send your story to jeffle@caloriefactory.com – we look forward to publishing it.

Comments (8)

Join us!

Listen with webreader

If you’re following CalorieFactory – well, thank you, you didn’t have to do that but we sure appreciate it.

If you like what you’re seeing (and we have many plans in the works for more stories, more people and some awesome contributing editors) – well, please take a moment and suggest to your friends that they consider following Calorie Factory. You’ll be glad you did. And – no question at all – *we’ll* be extremely grateful.

Leave a Comment

Deconstructed Pasta con Sardina – The Rest of the Story + A Recipe

Listen with webreader

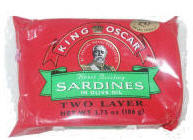
Two layers of the wee fishies in olive oil - from the King

Convinced by my artful weaving of celery leaves and sardines into a little deconstructed appetizer, Bonney agreed to give Pasta con Sardina whirl. I think it turned out pretty well, based on the fact that her serving vanished in mere moments, leaving behind only a vague fishy aroma in the air, a tiny speck of green on her plate, and the luscious aroma of metabolizing garlic.

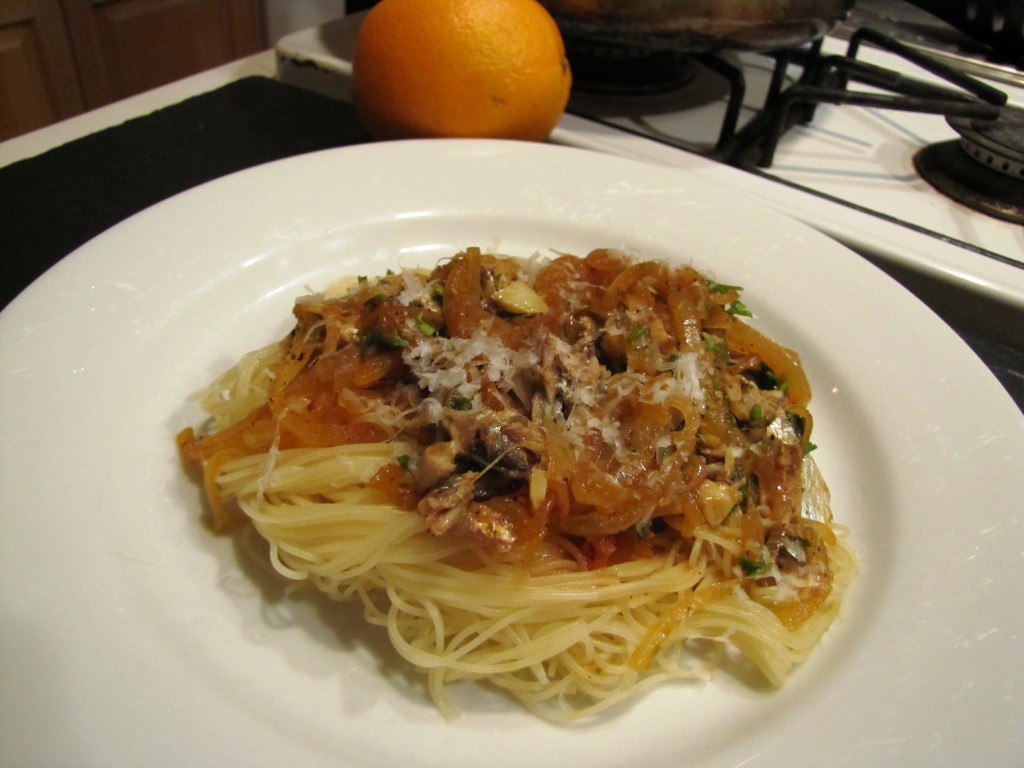
Here’s the way the dish ended up:

Skinny pasta with sardines, onion, garlic, lemon, red pepper flakes, lil tomato paste, parsley

Capelli con Sardina

The Recipe

Ingredients (two servings, this scales pretty easily)

  • 8 oz. capelli d’angelo (angel’s hair ) or any long pasta shape of your choice.

Note: Traditionally, this served with a large, sturdy shape, like perciatelle or pappardelle. I think it would also be good with bucantini.

  • Splash olive oil + a small splash for the pasta
  • Half a medium onion, sliced.
  • Four cloves garlic, thinly sliced
  • A small handful of fresh parsley, coarsely chopped
  • A tablespoon of tomato paste
  • Two tablespoons dry vermouth
  • Water as needed to create a bit of sauce (about 1/3 C)
  • Red pepper flakes to taste
  • 1/3 cup panko breadcrumbs or to taste
  • Pinch of coarse salt, fresh ground pepper to taste.
  • One tin good quality sardines, packed in oil. I used King Oscar Two Layer in Olive Oil. I’ve been eating those forever, and I like ’em.

Note: If you know of a better sardine, I would love to hear about it!

  • Juice of half a juicy lemon + a tiny bit of finely minced zest. Two words: Microplane grater.
  • Grated Pecorino cheese

Preparation

Cook pasta al dente, toss with a teaspoon or two of olive oil for a moment, then add the bread crumbs and stir / toss to incorporate

Heat an 8-10″ fry pan over medium heat for a couple of moments until it’s hot, add a splash of olive oil, swirl and heat until it just starts to shimmer in the pan

Add the onions and cook, stirring and tossing regularly, until they’re soft and just starting to brown. Add the tomato paste and a pinch of coarse salt to the onions and stir thoroughly, cooking the tomato paste slightly

Add the garlic and cook until just fragrant

Add the vermouth and water, deglaze the pan, scraping at the bottom with an enormous wooden spoon.

Turn heat down to simmer

Add the pepper flakes and a few twists of fresh pepper, simmer for a moment, stirring gently

Add the sardines. The operative word is gently. These little guys have had a rough life, you want to show them some love. Also, they look a lot nicer when they’re not mashed into tiny pieces. So gently, with reverence. I put them into the sauce and just tried to cover them up with a little of the sauce to their sides. You’re really just trying to warm them up, they need no cooking.

Taste and correct for seasonings. You shouldn’t need much, if any, additional salt.

Pasta on plate. Sauce on pasta. Careful!! The wee fishies are still very breakable. Serve with grated Pecorino.

This went beautifully with a light salad. Bonney made a great salad with Trader Joe’s Salad / Herb mix (hey, it’s *winter* around here), some beautiful pieces of ripe Bosc pear, a few crumbs of Stilton cheese, and a few Lars Crispy Onions. Lars are (is?) the bomb! If you don’t have the time or inclination to crisp up your own onions or shallot, these little guys are beautiful, delicious, and made with only onions, vegetable oil, wheat flour and salt. Amelia at The Woodstock Farmers’ Market in Woodstock, Vermont, says she “worships these”. You can buy them at most good supermarkets. And you can even buy them at IKEA!

Bonney's beautiful salad

Leave a Comment

Sicilian Appetizer – Deconstructed Pasta con Sardina

Listen with webreader

Deconstruction is a word that’s used quite a lot in foodie circles. It was originally applied to literature by the French philosopher Jacques Derrida. He apparently also enjoyed cuisine, and you’ll see the term sprinkled liberally around in many blogs, Food Network shows and conversations.

Our friends at Wikipedia have this to say about deconstruction:

It is (an approach). . .which rigorously pursues the meaning of a text to the point of exposing the supposed contradictions and internal oppositions upon which it is founded – supposedly showing that those foundations are irreducibly complex, unstable, or impossible. It is an approach that may be deployed in philosophy, literary analysis, or other fields.

So – applying that to food, I might take the term to mean:

Disassembling a classic dish – something which is generally recognized as an entity unto itself – to expose and combine its individual elements in an entirely different way, with different relationships – often in a playful spirit (at least as I see much deconstruction in the realm of food).

A classic Sicilian dish is Pasta con Sardina – a wonderful dish based on sardines with lemon, pepper flakes, garlic, onion, herbs – often a little basil and / or oregano, and an appropriate pasta shape (click link to see a bit more about pasta shapes), often a pappardelle or perciatelle – a long noodle, robust and sturdy.

Tonight, I was trying to convince Bonney that she’d love this dish. She was a little iffy on the sardines. We don’t eat sardines much, and when we do, it’s usually when I fall prey to the unholy craving for a sardine sandwich with a little mayonnaise on rye with a bit of lettuce. Mea culpa – it’s sooooo good! Sprinkle of coarse salt on top – it just vanishes. I have no power over sardine sandwiches on rye.

So, I said, “how about if I make you a deconstructed version of this dish as a kind of appetizer – a little bite – so you can get the sense of the sardine and some of the other ingredients”.

Bonney’s nothing if not a great sport, so she said, “That sounds like a good idea,” and off I went, to make this:

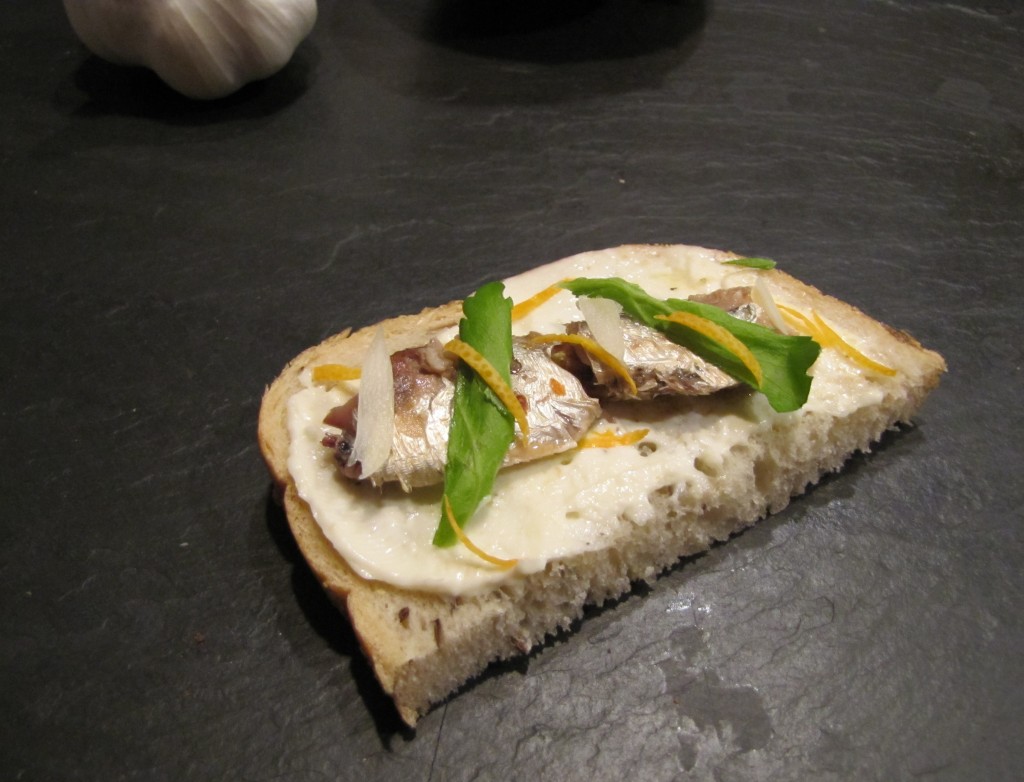
Deconstructed pasta con sardina

Holy smokes, is that deconstructed or what. Here’s what gives:

Pasta con sardina is essentially a sautee of onion and garlic, sometimes a lil tomato paste, salt, pepper, lemon juice, and sardines, on a robust long pasta, with Parmesan cheese grated over the top. It often has a bread crumb topping, as well.

The Deconstructed pasta con sardina appetizer I made is: A slice of rye bread, some extremely fine strands of fresh garlic, a little bit of a fine julienne of lemon, a torn celery leaf, teeny pinch coarse salt, teeny bit fresh ground pepper, about 6 hot red pepper flakes, and the smallest shreds of a good quality Pecorino cheese. I didn’t use the tomato, but I’m really not a strict deconstructionist.

The Result? Instead Winner!! She loved it, and is now ready to eat the main pasta dish when I fix it in a bit.

Deconstruction: It’s not only a rarefied literary theory and an often-misused foodie term – it can be your friend!!

Comments (4)

One Man’s Take on the Naga Viper Chili

Listen with webreader

I’m as much a fan of heat as the next demented madman, but I have to say that Darth Naga and his very funny VLog, The Chili Foundry, take the enjoyment of peppers to a new height. Or depth.
PG-13 warning, it is *not* pretty watching a grown man eating first a Naga Bhut and then a Naga Viper pepper all by themselves in swift succession on camera.

Man Vs. Viper (Chili)

Comments (2)

Coming Soon to Calorie Factory

Listen with webreader

We wanted to give you a preview of what we’re planning for content as we ramp up the Calorie Factory beta. Want to contribute an article? Got yourself a food-related story you want to tell? Drop us a line – we’d love to take a look – we’re actively seeking contributions!

My Father’s Latkes – In an unusual turn, my father taught me to cook when I was small, but I never learned to make his unbelievable potato latkes until he came to live with my family in his later life. 

Why Avgolemono Soup is the Perfect Food – I have yet to meet anybody who doesn’t like this simple, citrus-y soup. How we learned that Avogolemono was the perfect food.

Three Secrets to Competing in the World of Hot Peppers – Why the world of extreme heat is so competitive 

Getting it Right – Hot Peppers – How to sate your urge for foods others consider intolerably hot with special emphasis on ordering at Asian restaurants when you’d like about 100 Stars worth of heat while other eaters at the table are perhaps more moderate. Way more moderate.

Naga Jolokia – The Ghost is Loose – Reviews of the new Naga Viper chili and comparisons to the Naga Jolokia “Ghost Chili”. With specialty chilis getting as hot as commercial-grade pepper spray – how much is enough. For some, the limits have yet to be found, other people are saying that’s hot enough! Where are you in the spectrum?

Comments (2)

Cheese Is Where the Heart Is – Mac and Cheese Forever!

Listen with webreader

Macaroni and Cheese. Mac’n’Cheese. We ate it when we were little and we grew big. We ate it when we were sad and we grew happy. And big.  Mac ‘n’ Cheese is as near to comfort food nirvana as it gets.

Recipe below
Variations on a Theme: No need to follow the recipe really closely – feel free to add, subtract, change. Most Mac’n’Cheese purists don’t like to add a lot of additional ingredients – just the pasta and the cheese. But that’s a purist view – you go ahead and do what you like. Just remember the two critical things about a great Mac and cheese:

  • Don’t overcook the pasta
  • It is not possible to use too much cheese

A wonderful collection of pasta shapes and the reasons they exist - and recipes!!

Pasta Shapes. Would you even think about using, say, spaghetti or fettucine for your Mac and Cheese? I doubt it. How about a little orrechiette (the ear-shaped pasta) or possibly some fusilli? Not likely! There’s a reason there are so many different pasta shapes. Sure, part of the reason is they’re just fun and if you were fooling around with a few hundred pounds of flour, water, salt and the occasional egg for hundreds of years, you’d be likely to come up with a few unusual shapes yourself.

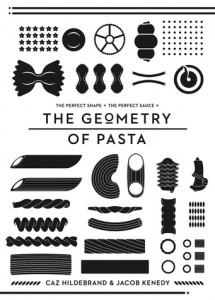
But the real reason there are so many pasta shapes – well, renowned British chef Jacob Kenedy notes in his excellent book “The Geometry of Pasta” that Pasta has evolved over many hundreds of years in Italy and it’s taken a long time for them to work out what tastes best. The right combo of pasta shape and sauce can be an exquisite experience.

I *highly* recommend this book, not only for Kenedy’s (often-intricate) and unusual recipes, but for the simple purity that he brings to the notion of pasta with a saucing. Caz Hildebrand is a cookbook designer and his take – No Photos! – but rather beautiful, drawn-to-scale images of the different shapes, only adds savor and interest to Kenedy’s thoughtful descriptions and engaging recipes. Pasta morphology – who’d a thunk it was so important??

CalorieFactory Mac and Cheese (10 minutes’ prep, 10 minutes for sauce, 30 minutes in oven, disappears in 5 minutes on table)

In keeping with the concept of using pasta morphology to complement and enhance the sauce, may I suggest that the pasta shapes for a great Mac and Cheese might include:

  • Historical American fave: The old standby, macaroni noodles. These are not, in my view, the optimal noodle, because they’re a little too small and tend to lie in the bed of cheesy wonderfulness and not soak too much up. But they work just fine.
  • Editor’s choice: Penne rigate – this is my favorite shape. The medium-sized tubes are just the right size to each admit a dollop of cheese sauce, while the ridged edges tend to collect more sauce on their exterior. Those ridged edges also brown up beautifully on the top of the dish, lending visual (they’re brown!), tactile (they crunch!), and flavorful interest to the dish.
  • Fast rising newcomer: Fusilli bucati – these spring-shaped babies form a spiral “hole” through their length and are excellent for holding and complementing the cheese sauce. Their spiral edges also brown up beautifully when baked

Ingredients

  • One pound of your choice of pasta. I like Penne Rigate
  • About 1.5 pounds cheese. Trust me. Remember the Rule “it is not possible to use too much cheese”. In addition to using cheese for the sauce, you’ll definitely want to layer a good deal of it on the top before you bake.
    • There is a fairly large contingent of people who believe that – due to their artificially designed melting properties – American cheese or even Velveeta makes the best Mac and Cheese. I urge you to give these products a miss. Instead, try:
      • Extra-sharp Cheddar. I live in the Northwest, and use Tillamook Vintage White Extra Sharp 2-year old white cheddar. If you’re fortunate enough to live in a place where Vermont’s remarkable Cabot Cheddar is available at a reasonable price, by all means, use Cabot Extra Sharp!
      • A nice block of Fontina – Fontina’s warm, companionable nature marries beautifully with the more assertive Cheddars
      • Parmesan, but be careful. Parmesan is a very strongly-flavored cheese that can overwhelm the gooey comfortableness you want. Used in small quantities, it can add to the savor.
      • Jack cheese. A nice whole milk Jack, combined with an Extra Sharp cheddar, will give a silky mellowness to your Mac and Cheese sauce.
  • Two cups whole milk (hey, you can use 2% if you want, but what’s the point?)
  • 1/2 stick unsalted butter + about a tablespoon for buttering the baking dish
  • Cornstarch to form a roux – should take about 4 Tablespoons or so
  • Salt and pepper to taste
  • 1 good sized shallot, minced
  • 3 cloves garlic, minced
  • Two tablespoons Dijon mustard. I used. . .Grey Poupon, but use any dijon you like. Feeling daring – use Coleman’s Mustard powder – about 3/4 teaspoon. Mix it with a little milk until it dissolves before adding it in. Definitely sharper and more assertive – some folks swear by it.
  • Couple of pinches nutmeg. If you want to be formal, call it 1/8th teaspoon. Nutmeg is a potent flavor – you don’t really want to *taste* it so much as have it support the other ingredients.
  • 2-3 Tablespoons vermouth or to taste (think cheese fondue!). Handy tip: 4 Tablespoons is 1/4 cup. I used 1/4 cup – I like the herbal flavor that vermouth adds.
  • 1 teaspoon smoked paprika or 1 tablespoon mild Hatch chili powder. I tried the Hatch in this recipe the other night and it turned out beautifully.
  • 1/2 cup or so Panko, a light flaky type of bread crumb that originated in Japan.
  • Optional: a few dashes of Tabasco to taste. Jury’s out on this. I like hot food as much (or more) than the next person, but it’s hard to justify in a sweetly elegant Mac and Cheese.
  • Medium sized glass baking dish, sufficient to hold all above. I use a square baking dish about 9″x9″, you can use anything of roughly this size

Preparation:

Preheat oven to 375, with the rack one up from the bottom level. Take the tablespoon of butter and butter your baking dish. I soften the butter in a microwave right in the baking dish, then smoosh it around the bottom and sides with my hand. Your hand is often the best tool.

Preheat the milk until it’s barely simmering (do not boil the milk!) in a separate saucepan. Grate all the cheese on the coarse side of a box grater on a large cutting board or into a good sized bowl. If using more than one cheese (which I recommend!), mix the different bits of grated cheese together with your hands. Put on a large pot of water to boil with two tablespoons of salt.

Mince shallot and garlic.

Heat a good sized frying pan over medium heat, cut the 1/2 stick of butter into 2 or 3 pieces and add to the pan. Swirl and/or stir the butter in the pan until it’s stopped foaming.

Add the shallot and cook, stirring frequently, for about 5 minutes, until soft and translucent. Add the garlic and cook for another minute or two until it’s fragrant. Cook with your nose. Add the mild Hatch chili (or smoked paprika) and stir it in thoroughly, stirring, for another 30 seconds or so.

Lower the heat a bit under the pan and add the cornstarch (about 1/4 Cup). Stir it lightly and quickly. The idea is to incorporate the cornstarch into the butter mixture. Once it’s incorporated, and there are no dry bits, keep stirring and moving it around for a few minutes until the “starchy” flavor is gone. Try to avoid having it turn brown by lowering the heat under the pan as necessary and stirring frequently. Now you’ve got a roux!

Slowly whisk in the preheated milk. Keep whisking. There will be little bits of roux here and there. Perhaps even big bits. Keep whisking.  If you’ve got the wrist for it, you can do this with a good sized dinner fork. The bits will go away. You can turn the heat up just a bit. Keep whisking. Soon the mixture will begin to thicken nicely. At this point, add the mustard, nutmeg and about 2/3rds of the grated cheese (one pound), stirring well to incorporate and mix. Continue heating, stirring consistently, until the mixture is simmering and thick. Keep at a simmer for a few minutes, stirring occasionally, and put the pasta in the boiling salted water.

While the pasta is cooking, stir the cheesy roux and taste it. Add salt and pepper to taste. I used about a teaspoon of salt and 5-6 twists of freshly ground black pepper. Keep tasting it.

Cook the pasta until it’s not quite al dente. The pasta will continue to cook in the baking pan, will absorb more of the flavor, and have better texture if it’s not completely cooked before you pop it in the oven.

Drain pasta, add pasta to buttered baking dish.

Using a spatula or wooden spoon, pour and scrape all the cheese sauce from the sauce pan over the pasta in the baking dish. Gently stir to incorporate, making sure every piece of pasta is lovingly bathed in the sauce. Use the back of a spoon or fork to flatten out the surface neatly.

Evenly sprinkle the remaining shredded cheese atop the mixture. Evenly sprinkle the Panko bread crumbs atop that. Some people say to dot the top with little bits of additional butter. Go ahead if you like – I don’t – the panko absorbs a lot of oil and butter from the cheese and sauce.

Pop it into the oven. Set your timer for 30 minutes. Ovens vary wildly, so at around 20 minutes or so, start checking. You’re looking for the dish to be bubbling a bit and the top to have a nice brown color.

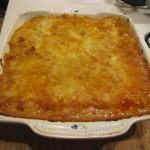
It ain't heavy, it's my dinner

CalorieFactory Mac and Cheese

Once it looks something like the picture, turn off the oven and remove the dish. Put the dish on top of a cutting board or stove. Let it rest for about 6-8 minutes. This gives the molten materials time to settle back and makes it much easier to serve.

To serve: Run your spatula around the side of the pan to loosen any sticking bits. Cut into serving size chunks – again, use the edge of your spatula. Get the spatula nicely under the chunk, move the plate close and pop it on the plate.

CalorieFactory recommends: OK, sure, this is a pretty rich dish. But you can provide counterpoint by serving it with a side of  lemon spinach. The short story (for four servings): About 12 oz. baby spinach leaves, 1/4 tsp. coarse salt (e.g. Kosher), Juice of half a lemon, pinch of brown sugar. Put the spinach in a glass bowl with a glass lid (or put a plate over the glass bowl). Add lemon juice, salt and sugar. Hold the lid – or the plate – firmly on the bowl and agitate around to coat the spinach leaves with the juice and seasoning.

Put it in the microwave for about 2 minutes, covered. Remove. Take a look, it should be cooked down to a small fraction of its original volume. If it is – great! Using a slotted spoon, serve it up. If not, give it another 20-30 seconds.

The spinach and lemon form a wonderful counterpoint to the Mac and Cheese. Taken together, these dishes offer Extreme Comfort and are endorsed by the American Society of Cardiologists.

Enjoy!

Comments (7)

CalorieFactory: Great Stories, Great Recipes

Listen with webreader

Cultures, countries, communities, families, individuals – we all have our own comfort foods, special dishes, and traditional preparations that make us think of  where we’ve been, what we love, and who we are.

CalorieFactory is filled with great stories and great recipes from foodies, chefs, cooks, BBQ mavens, and other folks who love life, culture, and food.

Have a story to tell? Your grandmother’s noodles? Your Bubbe’s brisket? Your cravings for the foods of your childhood? Your funny uncle’s BBQ? The dinner party that nearly went awry – but didn’t?

Join us. You’re in the right place. CalorieFactory.

Leave a Comment

« Newer Posts